15 Easy to Follow Camera Tips Every iPhone Pro Users Should Know
There are some not so obvious tricks like hold the shutter button and slide up in Photo mode to start recording video. Or when recording a video, tap on the white button to take a photo. Even choosing to take close-up with the telephoto lens versus the out of focus main wide camera. Check out these 16 easy to follow tips for iPhone Pro smartphones.
With the iPhone Pro and Pro Max, you have three separate rear cameras to shoot with, coupled with advanced AI, shooting modes and settings,
Don’t just point and shoot
The iPhone Pro and Pro Max camera is just as advanced if not more as some of the DSLR and compact digital cameras out there. But for the majority of us, we care not about the settings or how to take better quality photos and simply tap on the shutter button to shoot.
Here, we break down some of the basic, intermediate and advance tips to deliver 16 easy to follow camera tips every iPhone Pro users should now.
The Basic Tips
Here are the 5 basic camera tips to start:
- Composition Grid for Rule of Third
- Show preview outside the frame
- Tap on subject to change focus
- Tap and hold on subject or background to lock exposure and focus AE/AF Lock
- Tap and slide up or down to adjust exposure level manually
1. Composition Grid for Rule of Thirds
STEPS: Settings > Camera > Grid (under Composition)
Turn on the composition grid to help frame your shot better. You can level your horizons and get your perspective lines in order as well as use the Rule of Thirds. The latter is a classic technique to frame your shot by putting your subject on the line or where the lines crosses instead of just being in the middle all the time. You can also use the grid as a guide to divide your background and foreground, to look for symmetry and patterns, to create depth and to work with leading lines.
Related: Leading Lines in Composition: What are they and how to take better photos with them
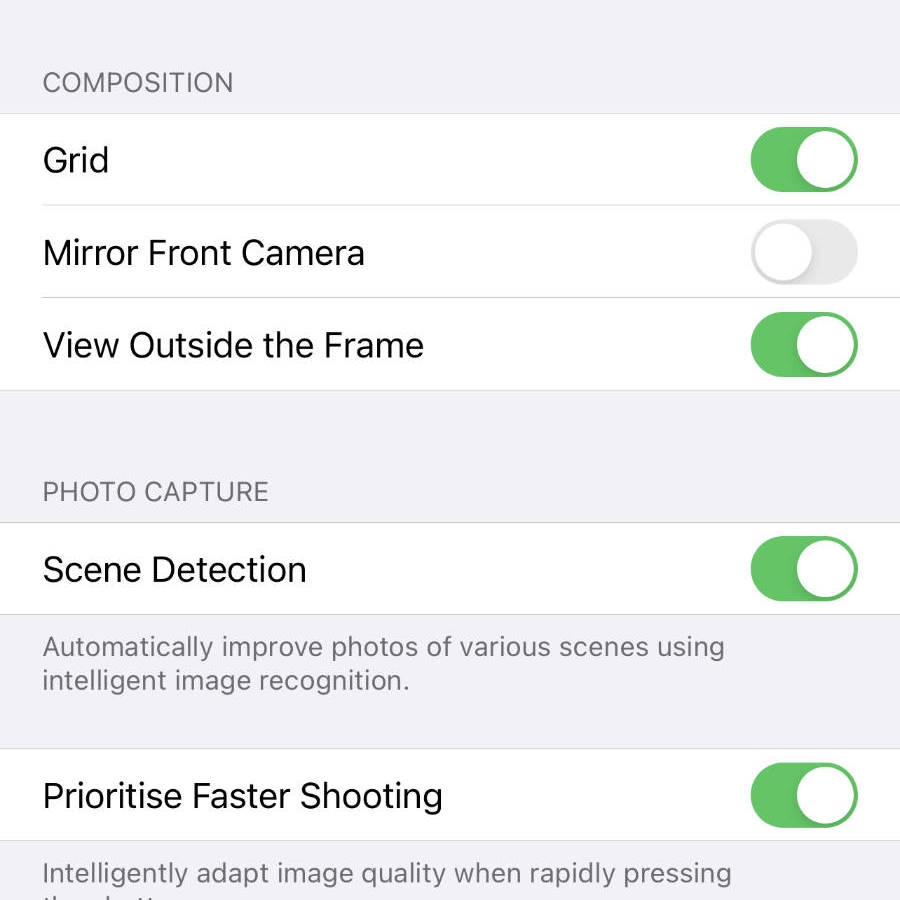
2. Show preview outside the frame
STEPS: Settings > Camera > View Outside the Frame (under Composition)
Due to the aspect ratio of the display, when capturing your photos using the camera app in 4:3 ratio, you get black bars above and below the frame when shooting in portrait, or on either sides when choosing in landscape. Wouldn’t it be great to see what you are missing. You can frame your camera better with a little help from this next setting. Turn on “View Outside the Frame” using the steps above. Decide if you want to zoom in or out, physically move in or out, turn left or right, to include what you missed . What this does is to show you what is under the black bands. Note that this only works when you start to zoom in or flip to 2.5x zoom camera.
3. Tap on subject to change focus
Don’t just point and shoot, leaving to chance. By simply tapping on the subject, it allows the camera to automatically focus on and set the right exposure for your subject making sure you get the best light and sharpest photo. This is particularly useful if your subject is in the background, in front of moving objects, traffic or people, is among other things and you want to make sure it is in focus, off-center or if you are shooting a portrait macro.
4. Tap and hold on subject or background to lock exposure and focus (AE/AF Lock)
Taking the tap to focus one step further. Use tap and hold to lock the focus and exposure. To engage AE/AF Lock, tap and old down on the subject or background in the camera app until an AE/AF Lock indicator appear on the top and a yellow box stays on the viewfinder window. The focus and exposure setting is now locked to that specific point. This is useful when your subject in the foreground is way smaller than the background. The phone will automatically focus on what takes up the most space in the frame. To deactivate AE/AF Lock, tap on the screen again.
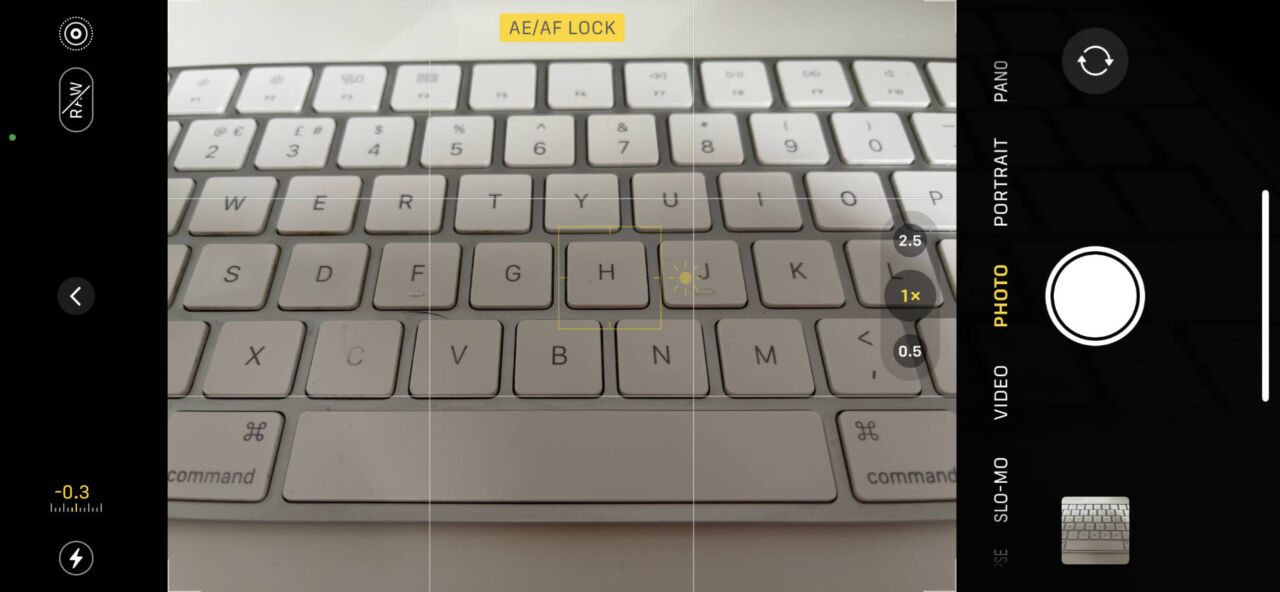
Other scenarios for AE/AF Lock include fixing focus and exposure for subsequent shots as long as you don’t move forward and back, light up dimly lit or darken a brightly lit subject in the frame by changing the exposure lock so your shot is not over or under exposed, capture close-ups and macros and avoid the camera from focusing on moving background. You can also use AE/AF Lock if you have a passing subject you want to capture when they reach a certain point in your frame, centred of off-centred. This could be a bird standing on the bird bath or eating off the bird feeder or someone crossing the street.
5. Tap and slide up or down to adjust exposure level manually
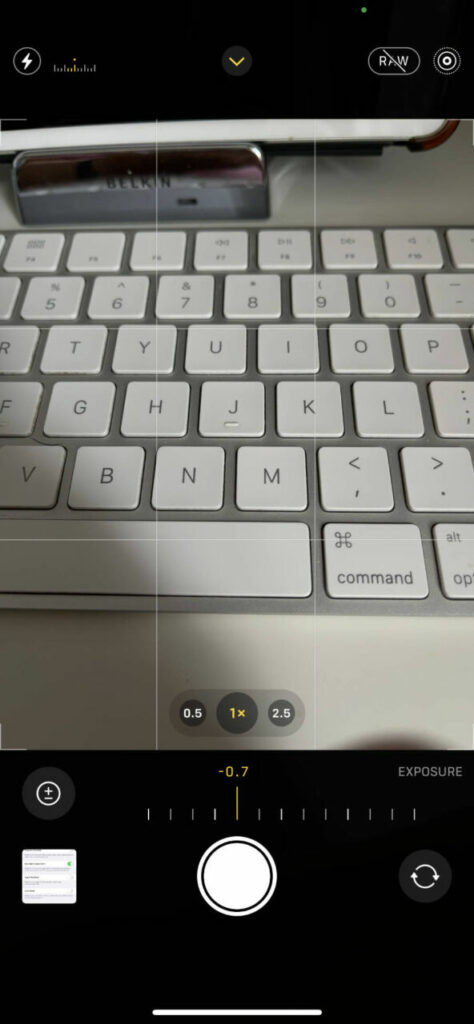
If you want to manually switch up or down the exposure level, tape on the subject, there is a light beam icon next to the box, slide this up to increase exposure making your shot lighter, or down to decrease exposure making your shot darker.
The Intermediate Tips
Next, these intermediate tips that lets you access more settings in the camera app:
- Call up additional options
- Capture in JPEG instead of HEIF/HEVC
- Night mode
- Change photo aspect ratio
- Access the zoom wheel
6. Call up additional options
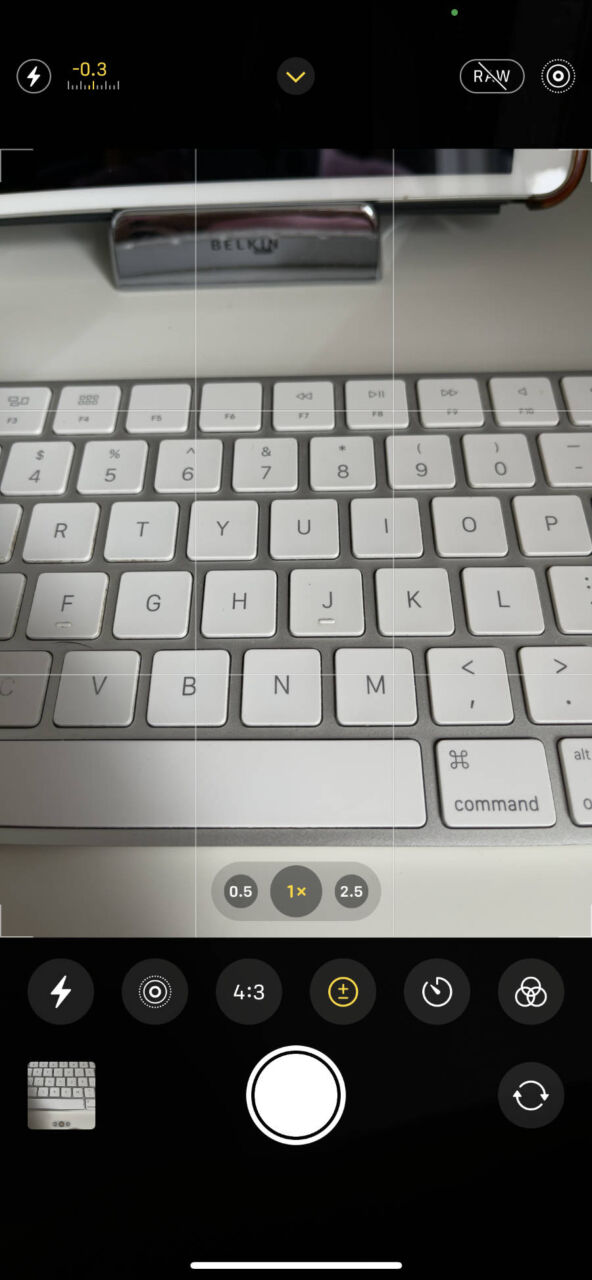
STEP: Tap on Chevron (pointing upwards in portrait mode, or to the left in landscape mode) to reveal option on the opposite black bar.
Access additional options in every shooting mode (time lapse, video, photo, portrait) by tapping on the chevron button on the top middle of the camera app in portrait mode or left middle in landscape mode. For instance, tapping on the chevron in Photo mode brings up flash, night mode, Live Photo, aspect ratio, exposure, timer, effects and slide left for more.
7. Capture in JPEG instead of HEIF/HEVC
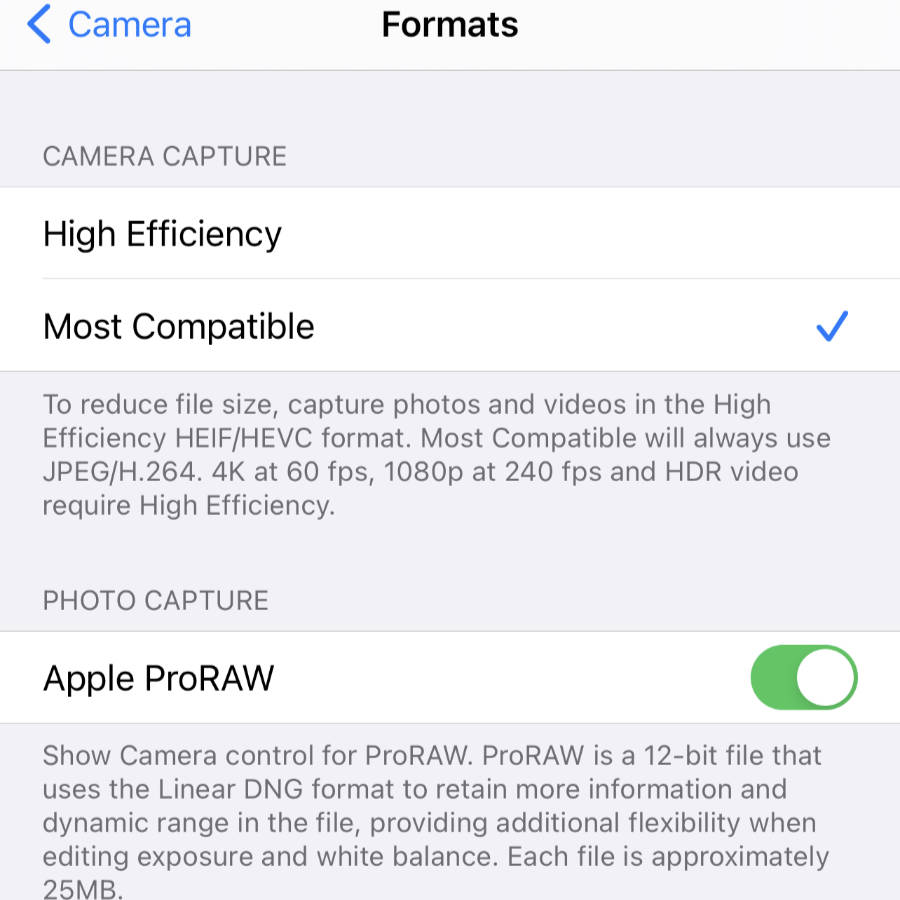
STEPS: Settings > Camera > Formats > switch to Most Compatible or High Efficiency
By default, Apple sets the captured images and videos to use the highly efficient and proprietary HEIF/HEVC formats. This can be a problem when you decide to share your photos with others especially those on other platforms or if you have any older photo or video editor that do not support HEIF/HEVC. In this case switch to Most Compatible to use JPEG/H.264 format. Otherwise, stay with High Efficiency as not only are the files smaller, it also supports HDR video capture.
8. Night Mode
When shooting in the dark, hold the phone still, until shutter completes the image capture. Auto Exposure sets the exposure time to 2 seconds or more, sometimes 10 second. You can manually set this using Exposure Adjustment shortcut mentioned below or drag the countdown slider.
9. Change Photo Aspect Ratio
Choose between Square, 4:3 or widescreen 16:9 aspect ratio by accessing the shooting options using the chevron toggle button located in top middle of the camera app.
10. Access the Zoom Wheel
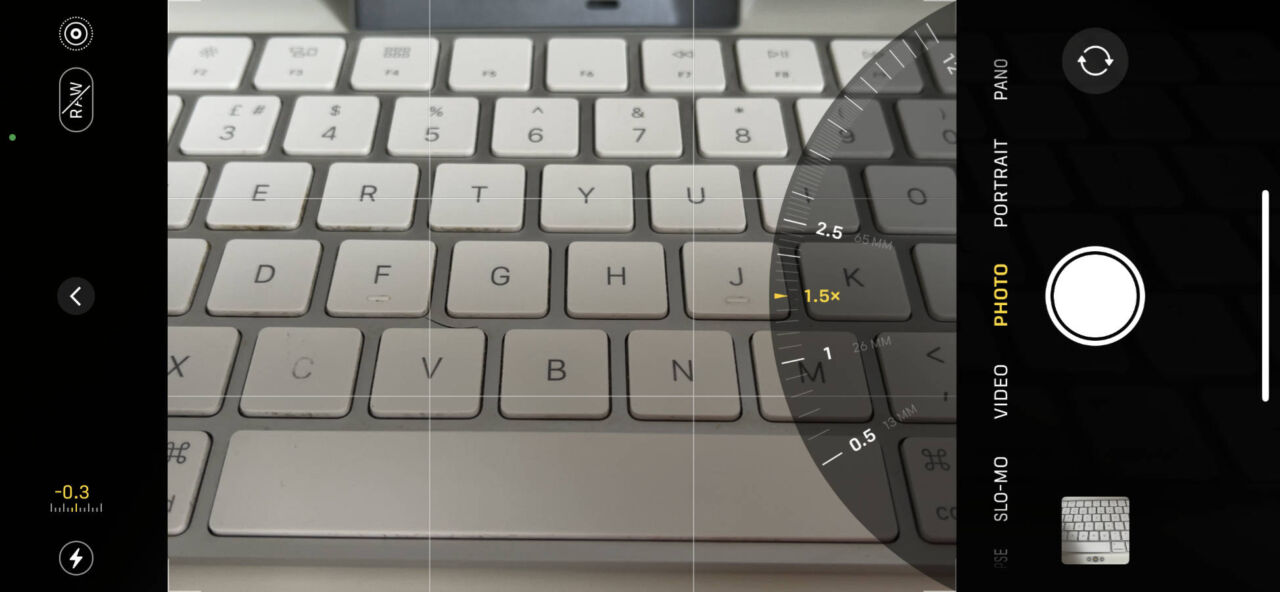
Tap and drag between the three zoom options (0.5x, 1x and 2.0x or 2.5x) to access the Zoom Wheel and gradually change the zoom level instead of jumping from one to the other abruptly.
The Advance Tips
Finally, we leave you with six advanced settings and tips to truly take your smartphone photography to the next level.
- Enable Apple ProRAW
- Enable exposure adjustment shortcut
- Enable HDR Dolby Vision video capture
- Enable Smart HDR 3
- Capture natural bokeh
- Manually adjust f-stop (aperture size) in Portrait mode
11. Enable Apple ProRAW
STEPS: Settings > Camera > Formats > toggle Apple ProRAW to on
You now have access to RAW shortcut on the top right corner next to Live Photo in camera app.
Unlike highly efficient HEIC image file format and most compatible JPEG image file format, Apple ProRAW format is uncompressed therefore uses the most space. Professionals choose Apple ProRAW to preserve tonal details, maximise image quality and post capture photo editing.
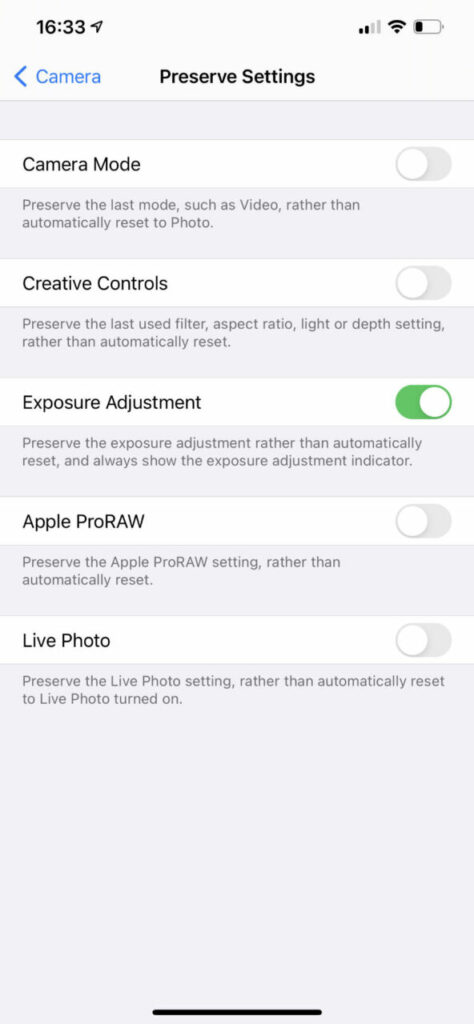
To continue shooting in ProRAW format, use the following steps to keep it in ProRAW setting.
STEPS: Settings > Camera > Preserve settings > toggle Apple ProRAW to On

NOTE: With the amount of information that it captures, you are bound to need more storage for your photos (approx. 25MB per image) be it on the iPhone or computer. Not something that professionals would worry about but for the enthusiasts, you’ve been warned.
12. Enable exposure adjustment shortcut
STEPS: Settings > Camera > Preserve settings > toggle Exposure Adjustment to On
You now have access to exposure shortcut and slider on the top left corner next to Flash in camera app. Tap on this and you can fine tune the exposure level using a slider appearing at the bottom (portrait) or sidebar (landscape) next to the shutter button.
13. Enable HDR Dolby Vision Video Capture
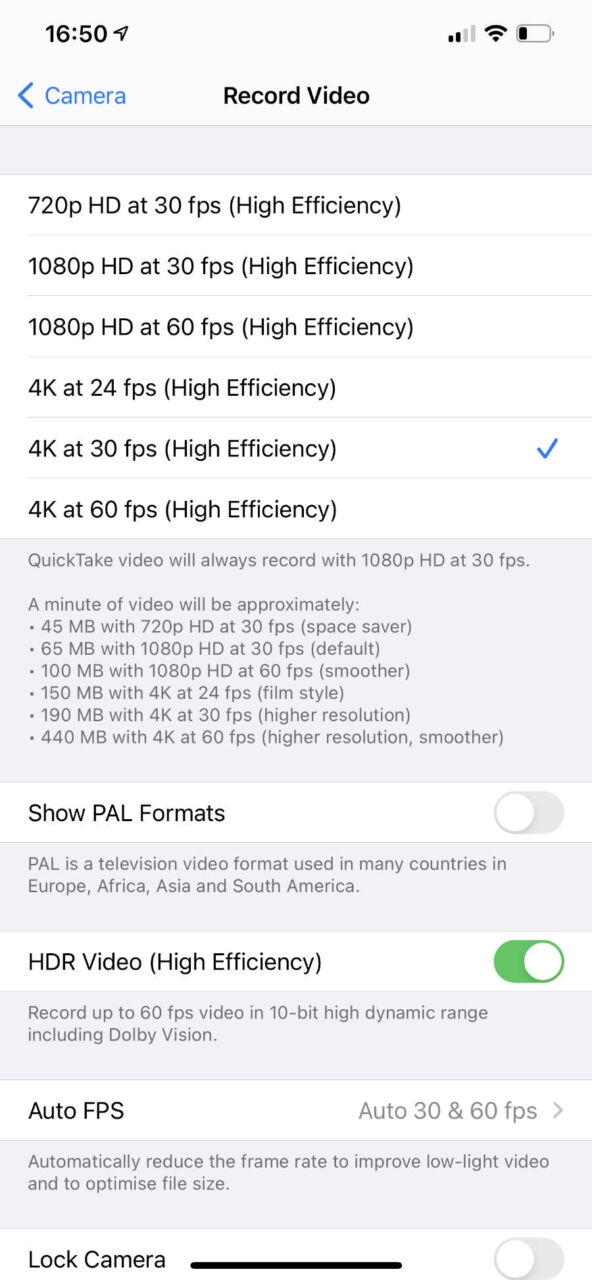
STEPS: Settings > Camera > Record Video > toggle HDR Video (High Efficiency) to On
One of the biggest advances of iPhone Pro Max is its ability to capture video with HDR (High Dynamic Range) particularly Dolby Vision HDR. This gives the video richer colours, more contrast and depth. This is different to Smart HDR, a feature for shooting stills which we would also recommend that you switch on below. With HDR Video turned on, the camera captures video with 10-bit HDR data, capable of carrying 60 times more colours for a seriously lifelike video. Now, you can choose to edit the 4K Dolby Vision video on the phone or on the Mac you already have a TV set that supports Dolby Vision
14. Enable Smart HDR 3
STEPS: Settings > Camera > scroll down and toggle Smart HDR to On
Unless you are a purist and would prefer your photos as they are capture OR if you prefer to do your own post processing using your favourite photo editing app, use Smart HDR. This feature take multiple shots at different exposure and automatically and intelligently combines the best parts into a single image that pops. If you have Live Photo turned on, you will immediately see the post processing result on your phone when reviewing them in Photos app.
15. Capture natural bokeh
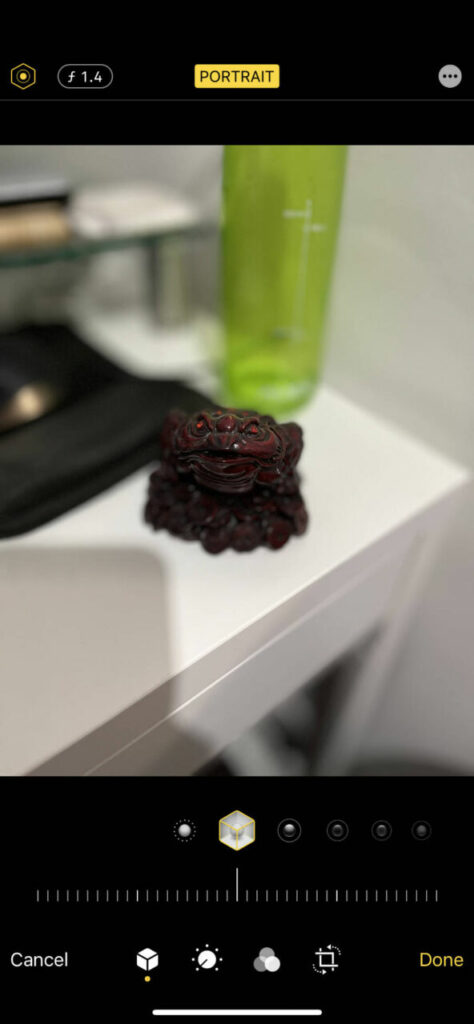
Bokeh or background blur effect is a desirable camera effect to place emphasis on the subject. This could be still life, person in a portrait or object. A lot of smartphone cameras, iPhone’s included, include the ability to capture portrait with bokeh effect. This is made possible with clever sensors; a time of flight (infra red or laser), the use of a depth sensing camera or in Apple’s case, the use of LiDAR Scanner. But here is for the purist again, a way to capture natural bokeh.
To do this switch over to the 2.5x telephone camera in your camera app and capture your subject up close. You will see evidence of natural bokeh in your photo, removing all the distractions and focusing only on the subject.
16. Manually adjust f-stop (aperture size) in Portrait mode
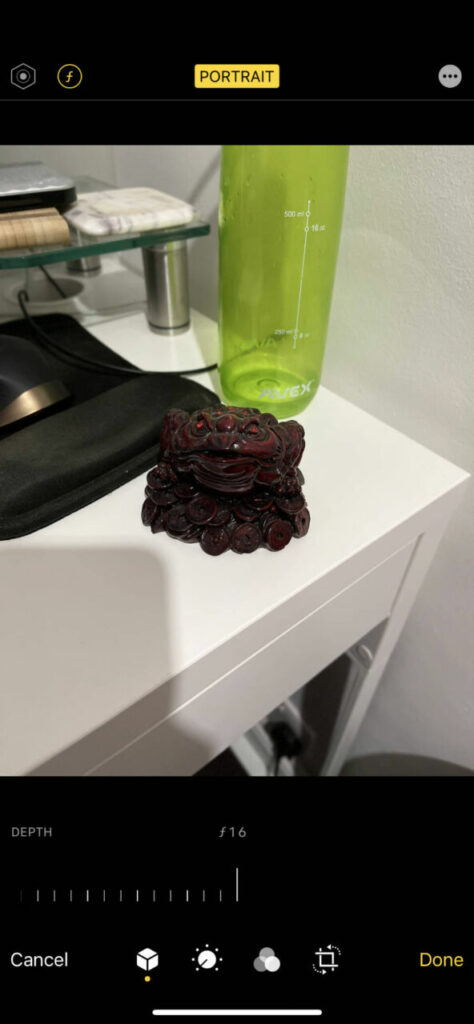
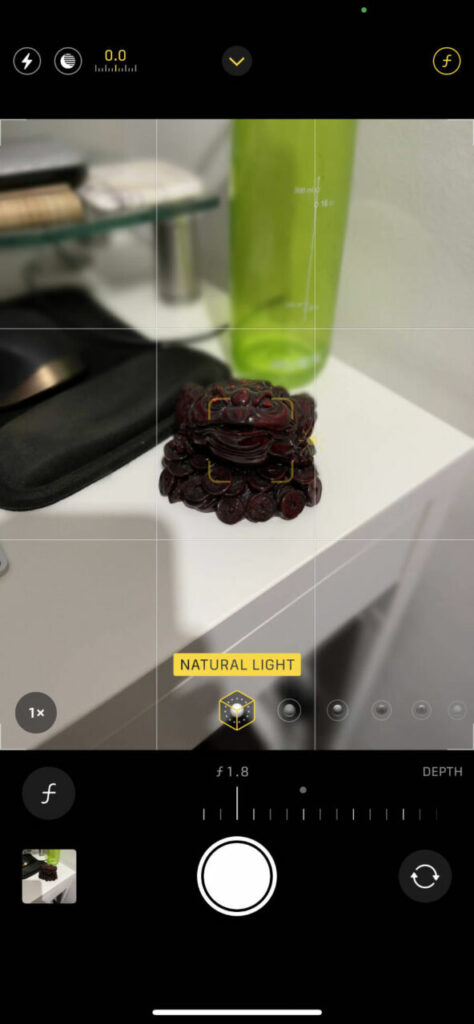
In a DSLR camera, you can adjust the f-stop, increasing this to create a bokeh effect. With the smartphone camera, it takes a different approach, one that we mentioned earlier with the use of depth sensors. However, it goes one up on the DSLR by letting you change the f-stop before and after you have taken the shot. It is after all digital manipulation. Here is how you do it. Switch over to Portrait mode, then tap on the f-stop icon, top right corner in portrait. The f-stop slider will appear near the shutter button. Slide this to increase or decrease the aperture. The smaller the number the bigger the blur or bokeh effect. After you have take the shot, you can still go back and choose a different aperture size. Open the photo you have just taken in Photos app, tap on Edit (top right corner) then tap of the f number (top left corner). This will bring up the exposure slider again. Choose a bigger number and the background will become clearer. You can also choose a different portrait light setting here.
