The Exposure Triangle Explained – Shutter Speed, ISO and Aperture
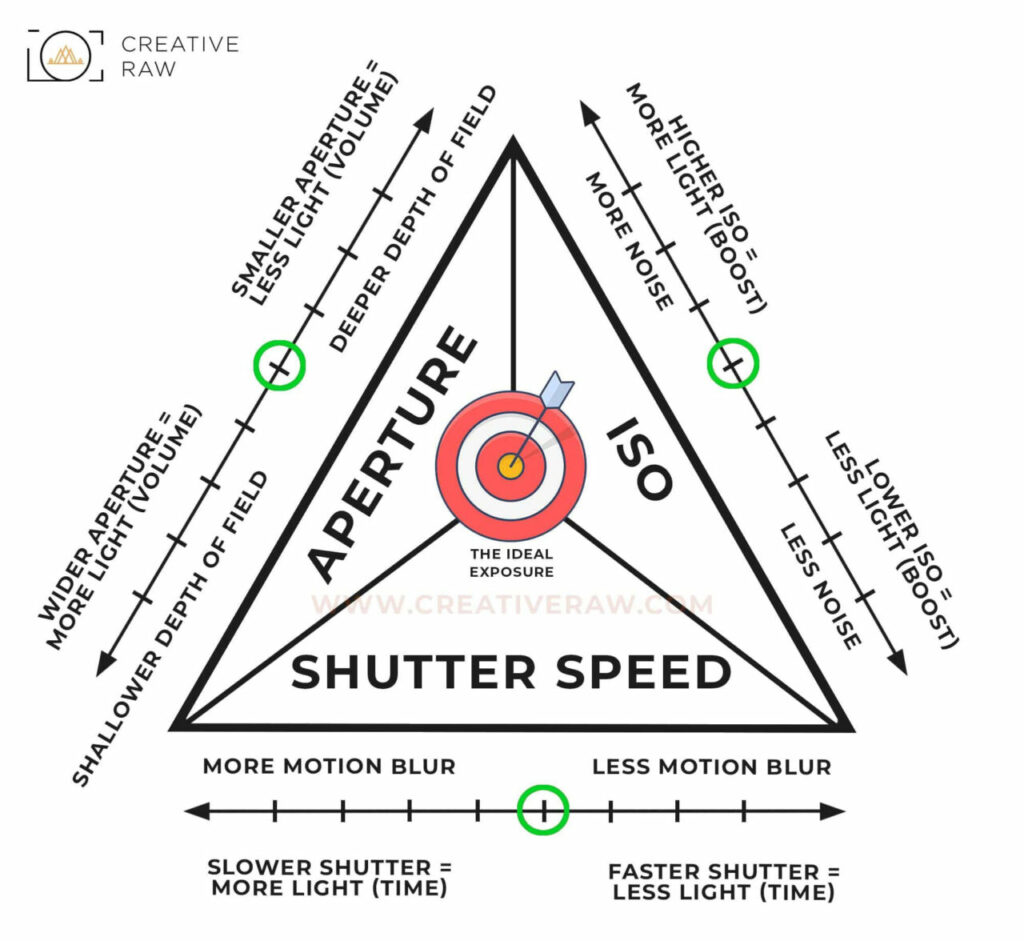
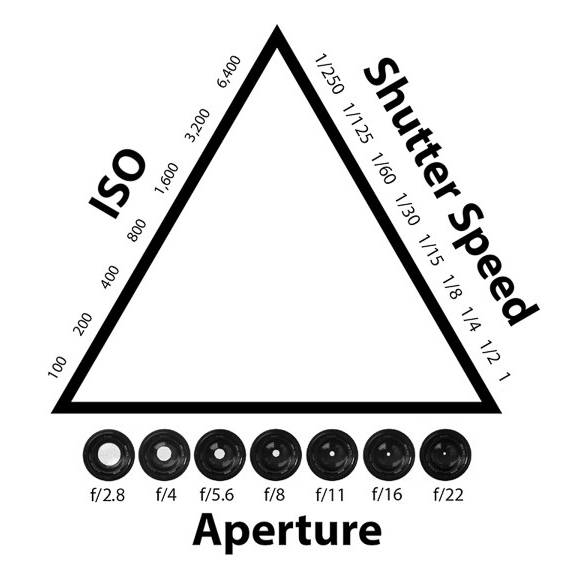
Shutter speed, aperture, and ISO together are known as the Holy Trinity of photographic exposure. Understanding the relationship between these three aspects of photography will give you a solid platform on which to base your entire photography career. These three form the foundation on which the world of photography is based.
As you may have heard, photography is all about light. It is all about capturing or eliminating light in the frame. Whether you capture more of it or eliminate it from the frame, you are telling a story. The way you compellingly tell that story makes for a compelling image and a ultimately, a good photograph.
Coming back to the discussion on the exposure triangle. The exposure triangle is a synergy of three aspects of your camera. The component of the exposure triangle are as follows:
- Aperture
- ISO
- Shutter speed
We shall go through each one of them here and understand how they impact your photographs.
Shutter Speed
Very simply shutter speed denotes the length of time for which the shutter curtains inside the camera remain open and therefore allow light to travel through the lens barrel and hit the imaging sensor (or film, if you still have a film camera knocking about).
The speed here refers to how fast the shutter curtains open and close, and the time in between. If you compare this to the human eye, the shutter curtains in the camera is akin to the eyelids, and the shutter speed refers to the duration in which the eyelids are open, although in practice, you will have to close your eyes and open and close it pretty fast to simulate a shutter speed.
Thus, the whole human eye can be compared with that of a camera. The eyelids act as the shutter curtains, the pupil acts as the aperture and the retina at the back of the camera acts as the photographic film/imaging sensor where the image is formed.
Just like the human eyelids open to let in light inside the eye through the pupil, the shutter curtains of a camera open up to let light from the scene in front of the camera pass through the aperture and onto the imaging sensor mounted at the back of the camera.
It is a very delicate and well-calibrated process. A quick run through as to how shutters are applied to different cameras is listed below:
A. On a DSLR
The shutter curtains, in their resting state, are always drawn shut over the sensor. That is if you are using a DSLR. The reason is that light coming through the lens barrel is redirected upwards towards a pentaprism which in turn reflects that light out towards the optical viewfinder located at the back of the camera.
To achieve this a reflex mirror, positioned right in the path of the incoming light directs the light towards the pentaprism (and then on towards the viewfinder at the back of the camera).
When you press the shutter release, the reflex mirror swings away from the path of the light, and the shutter curtains behind it opens, allowing light to fall on the imaging sensor.
However, doing so will cause a momentary blackout of your view through the viewfinder when the shutter release button is engaged.
This is why when you are shooting images, you will find that the view at the back of the viewfinder comes in and goes as the camera is firing the exposures.
Most of you with a DSLR would experience this short blackout. Even the image on the screen would pause before showing the captured image briefly.
B. On a mirrorless camera
The concept of a shutter curtain works a little differently on mirrorless cameras.
On a mirrorless camera obviously, there is no reflex mirror inside. The camera sensor is always on and the view that it sees is displayed on the back LCD screen and the Electronic Viewfinder. This is also known as Live view. You see exactly what the sensor sees.
That said, there are shutter curtains on them. When you press down the shutter release, the front curtain closes to obstruct light at first. Next, the front curtain reopens to expose the sensor to light. Finally, after the exposure is made the rear curtain closes. The whole close-open-close is how you control the shutter speed on mirrorless camera, The mechanism then resets for live view to be operational again.
C. Electronic front-curtain
Some cameras come with an electronic front curtain mechanism. However, that is outside the scope of this discussion so I will refrain from discussing that in detail. Perhaps some other time.
Measuring shutter speed
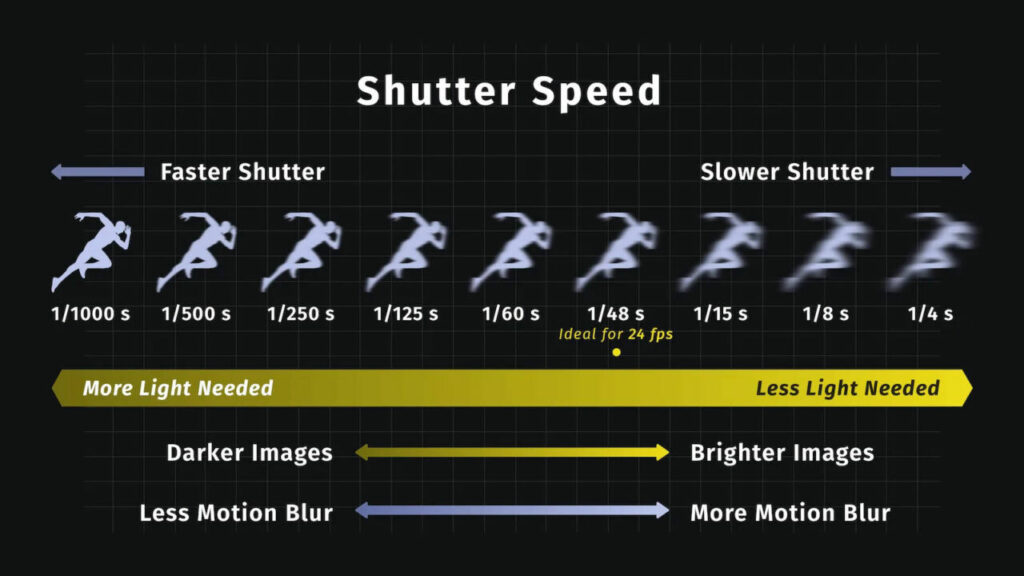
Shutter speed in a camera is measured in fractions of a second. If the shutter curtain is open for 1/500 second we call it a fast shutter speed. If it is open for 1/10 second or 1 full second we call it a long shutter speed or slow shutter speed.
The longer the duration for which the shutter curtain is open, the higher is the amount of light that reaches a sensor.
Can you tell me when you would normally keep the shutter curtain open for a long time frame?
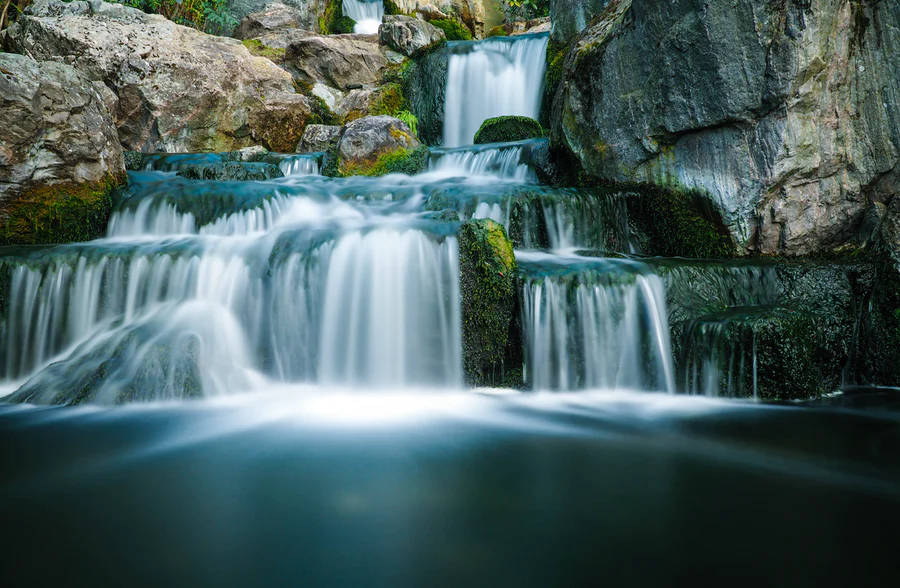
If you just said – during the night or when there is not much light to go around, you are right. We keep the shutter curtain open for a long duration when there is not much light to go around so that the sensor can capture sufficient light to make a proper exposure.
Apart from that, there are many creative reasons for using long shutter speed. We shall discuss that on a dedicated title someday.
Can you tell me when would you normally use a fast shutter speed?
If you just said – during broad daylight, you are right again.
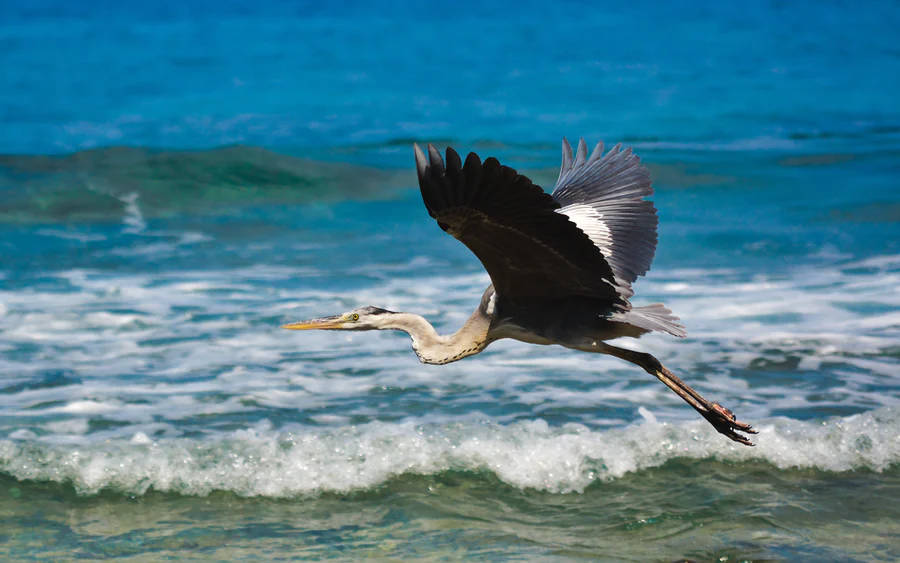
Another reason you would use a fast shutter speed is when you are shooting something very fast or moving quickly across the frame. A bird e.g. or an athlete or a cyclist or a sports car moving fast.
This helps to freeze the subject in motion and produce a sharp image.
Aperture
If you look at the human eye you will notice, there is a small black hole right in the middle surrounded by the iris. The aperture of a camera can be compared with that of the pupil, the hole through which light enters the camera. The iris can be compared with the aperture diaphragm.
Just as the human pupil gets contracted and dilated to control the amount of light that enters the eye, the same way the camera aperture can also be controlled, controlling the amount of light that enters the camera.
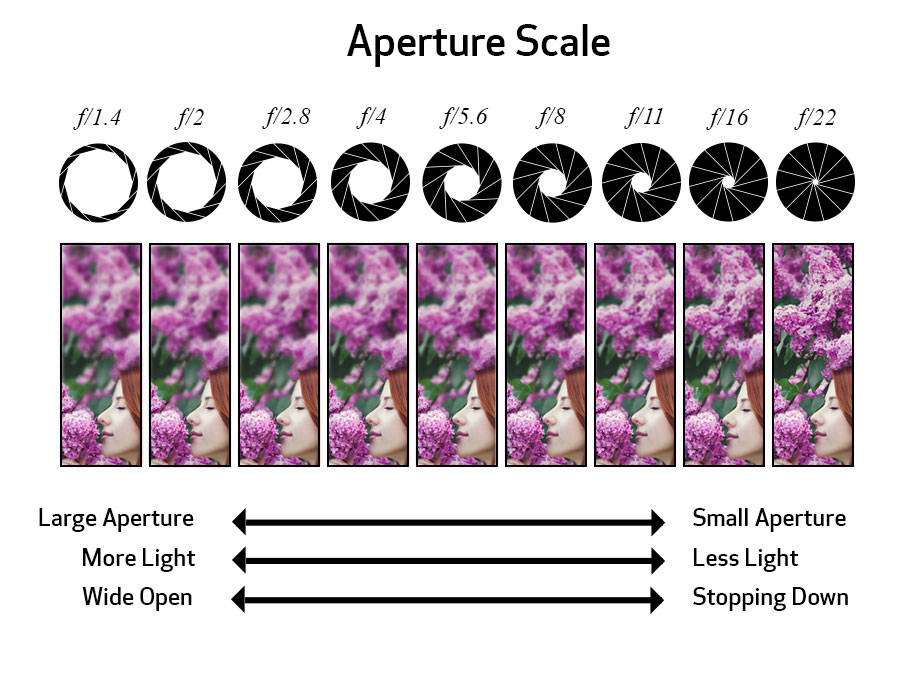
A smaller aperture suggests a smaller hole and that means less amount of light can enter the camera.
A larger aperture suggests a larger hole and that means a greater amount of light can enter the camera.
A. Measuring Aperture
Aperture is expressed in f-stops or f-numbers like f/2.8, f/4, f5.6, f8, and so on. Larger that number, smaller is the physical size of the aperture. On the other hand, smaller is that number, the larger is the physical size of the aperture.
Aperture has an inverse relationship with shutter speed. The smaller the shutter speed, the faster (larger) should be the aperture to compensate and vice versa.
B. Aperture and depth of field
While we are on the subject of aperture, it is a good idea to also discuss a few points on the depth of field, because the aperture does have a bearing on that.
Very quickly, depth of field is the extent of the image directly in front and behind the point of focus that is also acceptably sharp along with whatever you are focusing on.
It is important to note that the point of sharpest focus will always be whatever you are focusing on. Anything in front and behind that point of focus will be acceptably sharp and not perfectly sharp.
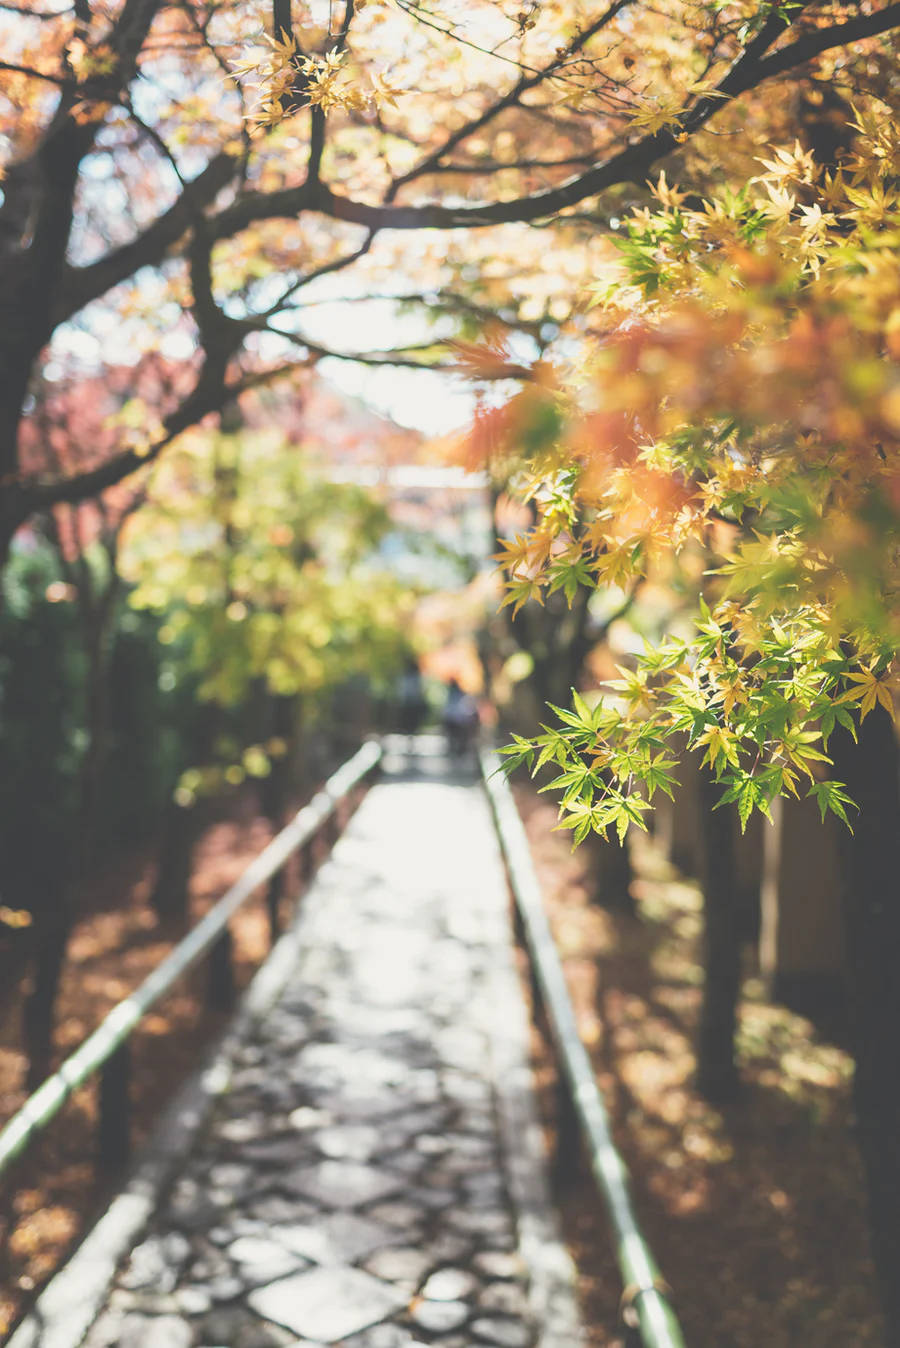
A smaller aperture, meaning a smaller hole has the effect of increasing that depth of field while a larger aperture meaning a larger hole has the opposite effect on depth of field.
C. Why does this happen?
When you open up the lens (use a larger aperture) light rays from across the frame start to enter in an uncollimated pattern. This is the primary reason why with a wider aperture you find much of the frame to be out of focus, except for that one point where the lens is focusing on and the immediate area.
ISO
Think of ISO as digital amplification. In practice, ISO has nothing to do with how the light is allowed through like Aperture and Shutter Speed. The job of ISO comes after the light has been collected by the camera. It simply ensures that the light signals that the camera received is amplified.
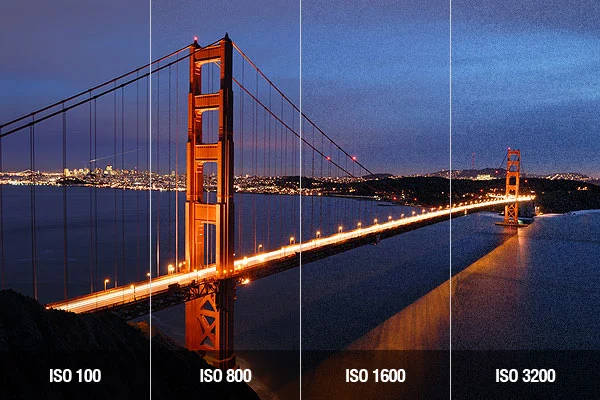
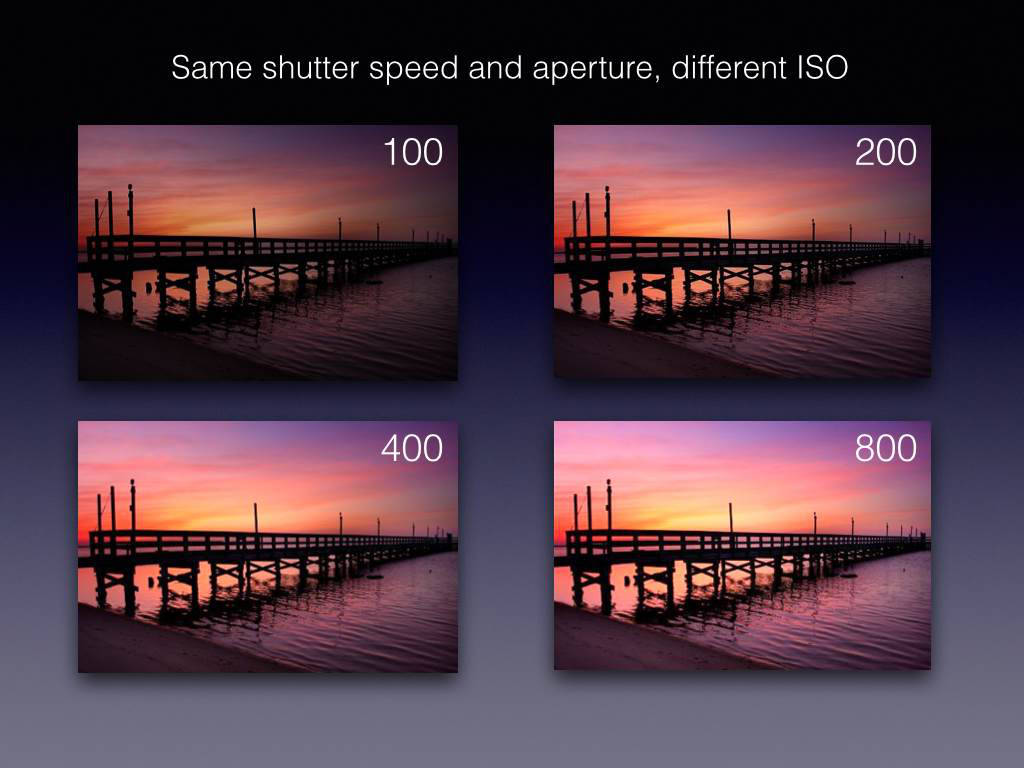
ISO is thus, digital amplification of the light signals. If your base ISO is 100 but you decide to use ISO 400 for an image, the light signals are amplified by four stops. In theory that has the same effect as opening up the aperture by four stops or slowing down the shutter speed by a factor of four stops.
But it is not that simple.
So, what happens when you digitally amplify a signal? If you are familiar with sound signals or TV signals you will have noticed that along with the main signal you also get static. The same thing happens with light signals too. When you amplify the main signal you also amplify the static and that static is recorded in the form of noise. We call it digital noise. They appear like specs of black dust on an image. Especially an image that has been shot in low light conditions.
So, although we do consider ISO to be part of the holy trinity of photographic exposure, it is not exactly an exposure parameter. Only aperture and shutter speed determine how much light is captured. ISO merely amplifies a sight signal and compensates when the amount of light is insufficient.
Conclusion
So there you have it, a guide to the Exposure Triangle. An understanding of the concept and what each component means would go a long way, especially for aspiring professional photographers or even enthusiasts. In any case, over exposure either via shutter speed or aperture size and use of higher ISO would invertantly cause undesired artefacts in your output as show below. A balanced approach to create the ideal exposure is what every photographer aspires to.
