How to enable and use Stage Manager on macOS and iPadOS
That fancy demo you saw of the new way to group your active apps together into different piles, switch between them quickly creating different workspace and putting multitasking on steroids is here. First introduced at WWDC 2022, Stage Manager is not only available on macOS Ventura but on iPadOS 16.2 or later, hardware permitting. Here. we look at how to make the most of it.
Some of you may have heard that Stage Manager only works on the iPad Pro powered by M1 or later. That only applies to iPadOS 16 beta. We have tested Stage Manager on both iPads, powered by A12Z Bionic (4th Gen) and M1 (5th Gen) and see no differences in performance. There is a caveat though, you can read about this at the bottom of this article.
How is Stage Manager different from Mission Control in macOS
Remember Mission Control? Where you can have an overview of all your open apps on the desktop, create multiple desktops and move apps around to create your own workspace. Within each desktop, you can continue to invoke the top down view of all your open apps, typically they would be overlapping and choose which one to bring forward.
Stage Manager is not very different except, everything happens on the same desktop with grouped apps showing as piles of windows on the left side keeping your desktop clutter free. Clicking on the pile will bring up the collection albeit still overlapping. You can set it to hide all the items on your desktops when invoked and bring up recently opened applications so they appear on top for better focus.
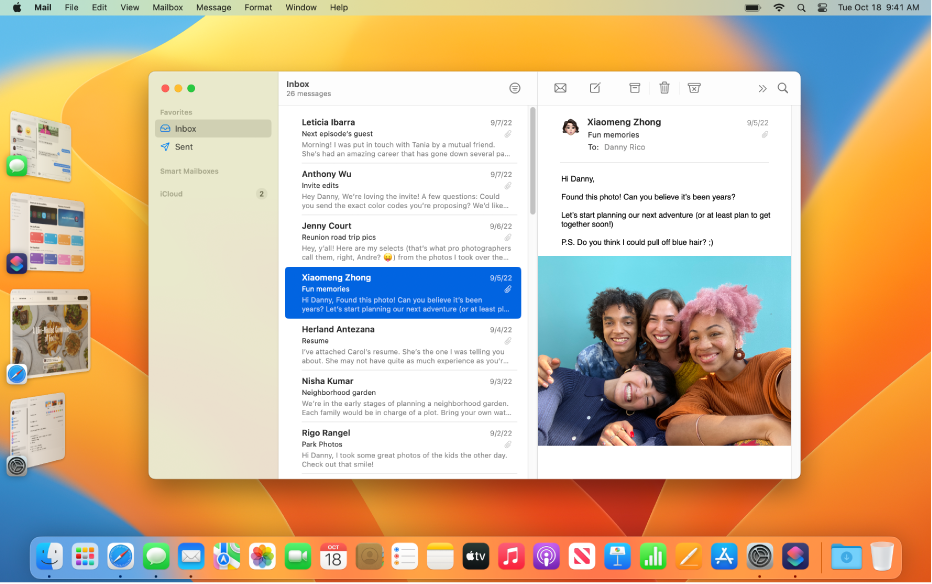
By comparison, Stage Manager is a slicker way of working as you do not have to switch desktop and still be able to group your apps and create different workspaces. Plus, the pile of open apps are live thumbnails so you can see if a message has come in or that email you’ve been waiting has arrived. It even shows videos playing.
In a way, Stage Manager is Apple’s response to Windows 11’s Snap Layouts feature. Snap Layouts allow users to choose from different layouts to snap their apps into. The aim, to optimise the way you multitask with multiple apps by arranging the windows in different preset patterns.
Customise Your Work Space, Enhance Your Work Flow
Ultimately, the aim of Stage Manager is to allow users more control over their desktop. It does not come on by default so you will need the steps below to enable and configure it. Like Mission Control, it is optional. You can choose not to use it, staying with the normal desktop interface. Once you get to know it, it may change the way you work, creating your own custom workspaces that optimise your work flow.
How to enable Stage Manager in macOS Ventura
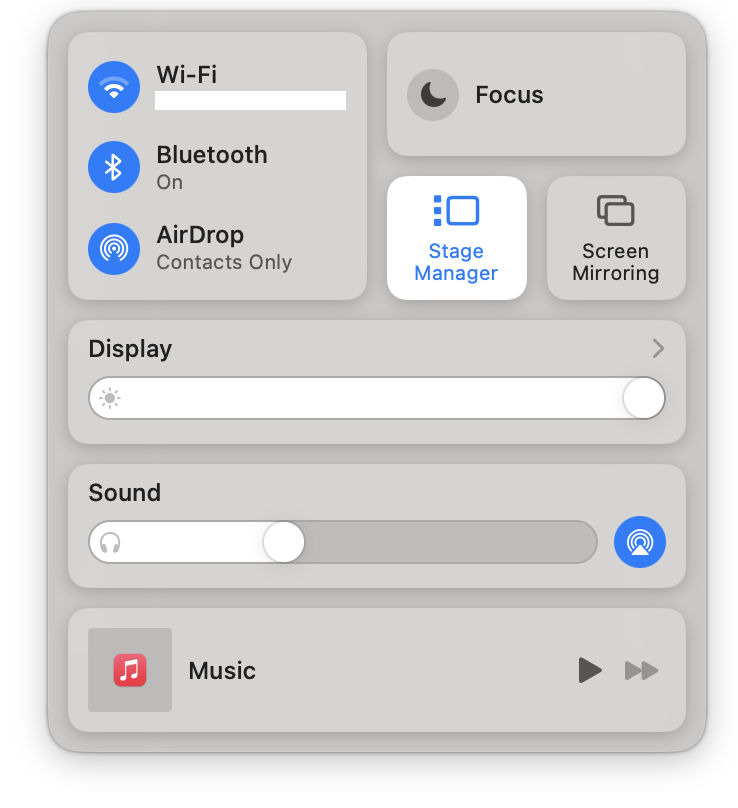
The quick and easy way to enable Stage Manager is:
- Click on Control Centre icon (top right corner) next to Siri, Day Date and Clock in the menu bar.
- Click on Stage Manager button. You can also make Stage Manager show in the menu bar – click on Apple icon top left corner in the menu bar > Systems Settings… > Control Centre then under Stage Manager pop-up menu choose Show in Menu Bar.
- A window will appear with the options and settings. If it doesn’t use the steps below
How to Customise Stage Manager Settings for macOS
- Click on Apple icon (top left corner) in the menu bar
- Click System Settings…
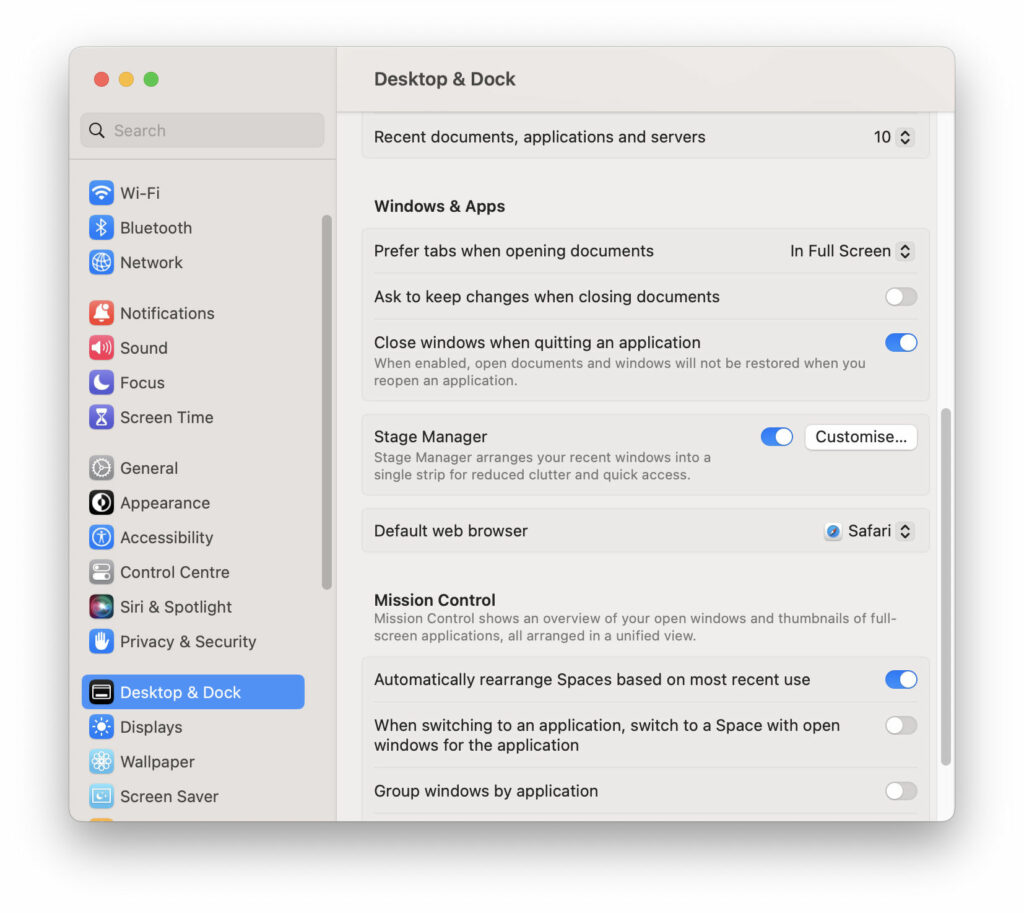
- In the left side bar click on Desktop & Dock, you may need to scroll down
- In the main pane, scroll down to Stage Manager and click on Customise…
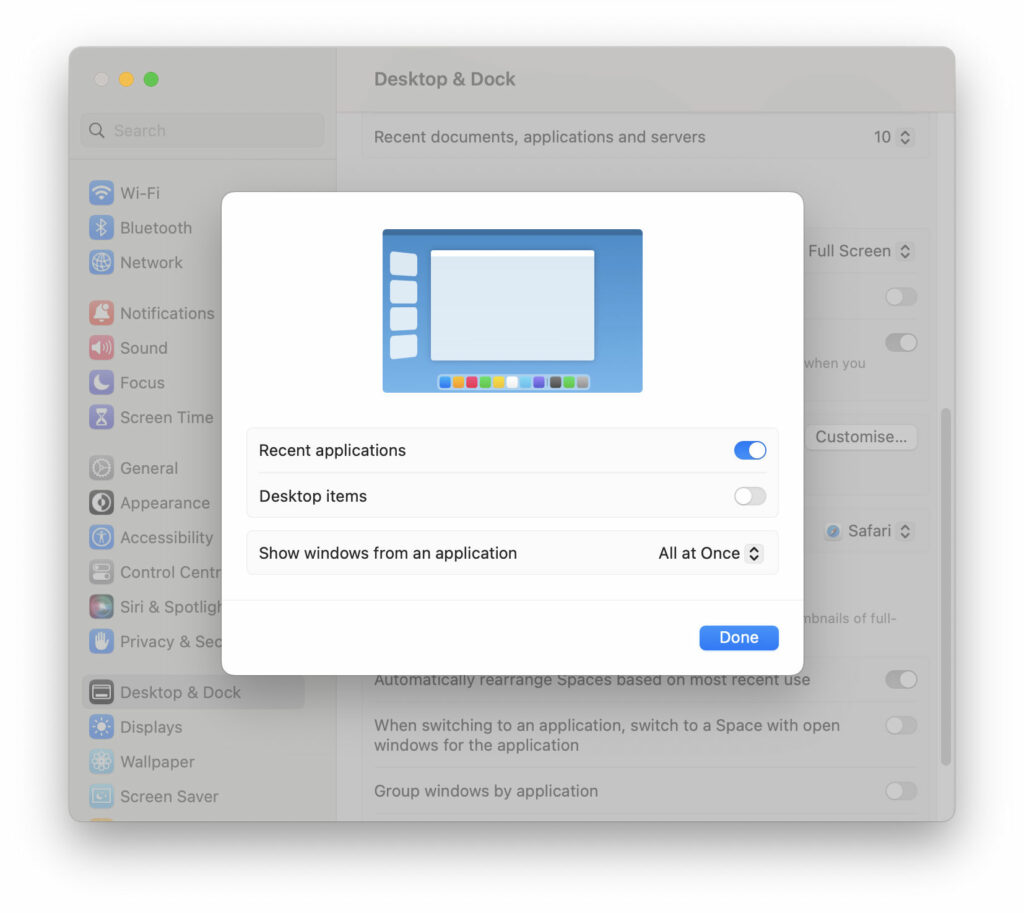
- Here you can change the following settings
- Recent applications toggle: show or hide recently used applications on the left side. If you choose to hide, you can call them up by moving your cursor to the left edge.
- Desktop Items toggle: show or hide desktop items like files, shortcuts, folders. This gives you a distraction free work space.
- Show windows from an application: choose to shows all open apps at once in the group (or pile) or one at a time. The latter stacks and centre the apps. Personally, I prefer all at once.
How to use Stage Manager in macOS
Once enabled, there are a couple of useful tricks to make the most of Stage Manager which I had to find out the hard way. As with everything new, there is a learning curve. This will hopefully soften it for you.
- Starting from a fresh boot, every app you open will have its own shortcut thumbnail on the left side
- You can group an app to the current active app in the middle by dragging the thumbnail into the centre. Unfortunately, dragging thumbnail onto thumbnail does not work.
- You can also do the same by holding down the Shift key and clicking on the app thumbnail on the left side.
- Creating groups means you can switch to a complete workspace with all the relevant apps
- Clicking on the desktop pushes all apps to the left side and into piles if grouped
- Switch between apps by clicking on another thumbnail or pile in the left side
- App icons among the thumbnail shortcuts indicates the apps currently opened on its own or in a pile
- Arrange and resize windows to create your custom workflow especially when you have grouped the apps into piles
- To ungroup your apps, drag an app to the left side and it separates from the group.
- If you can’t see the list of apps and piles on the left side, it is probably hidden. Move your cursor to the left edge and it will be revealed. If you prefer that it stays on, enable Recent applications in Customise Stage Manager above.
How to enable Stage Manager in iPadOS
Once you got the hang of Stage Manager in macOS, you might want to try it on the iPad. To turn Stage Manager on for your iPad, use the following steps:
- Open the Settings app
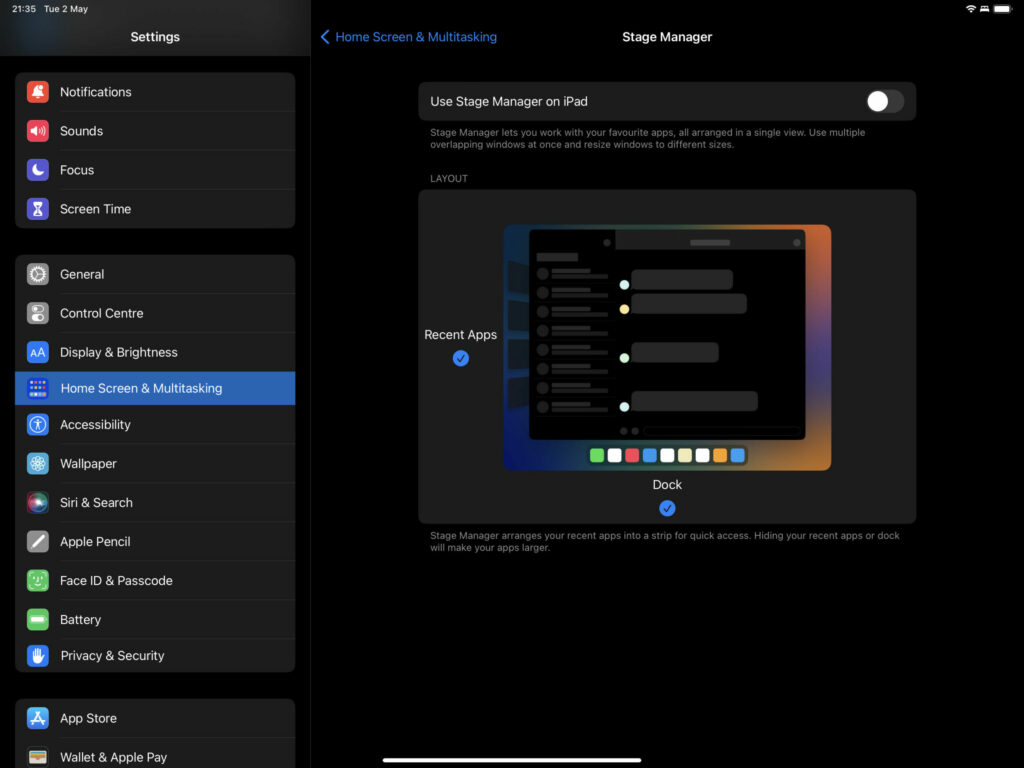
- Tap on Home Screen & Multitasking > Stage Manager
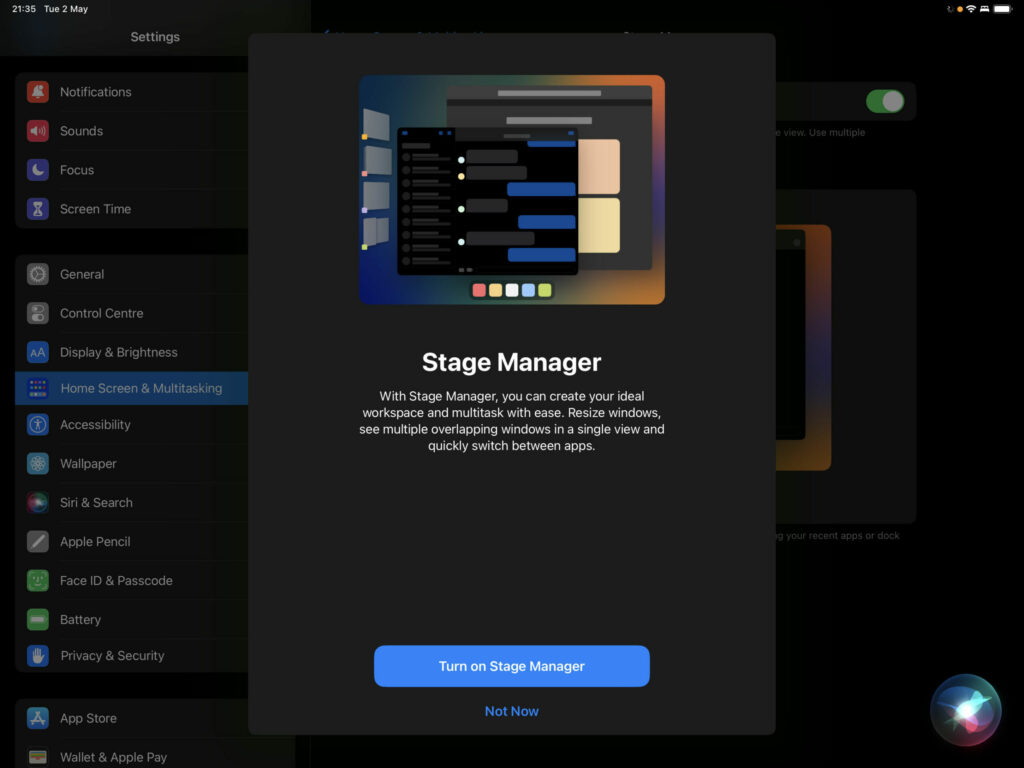
- Toggle on or off Use Stage Manager on iPad. A pop-up may appear if you are using this for the first time. If so tap on Turn on Stage Manager button.
How to Customise Stage Manager Settings for iPadOS
Here is also where you find two checkbox like settings
- Recent Apps: untick to hide recent apps on the left side, swipe in from left edge to reveal and tick to show it. Hiding does give you more ‘desktop’ space
- Dock: untick to hide the Dock, swipe up from bottom edge to reveal and tick to show it all the time. Hiding does give you more ‘desktop’ space
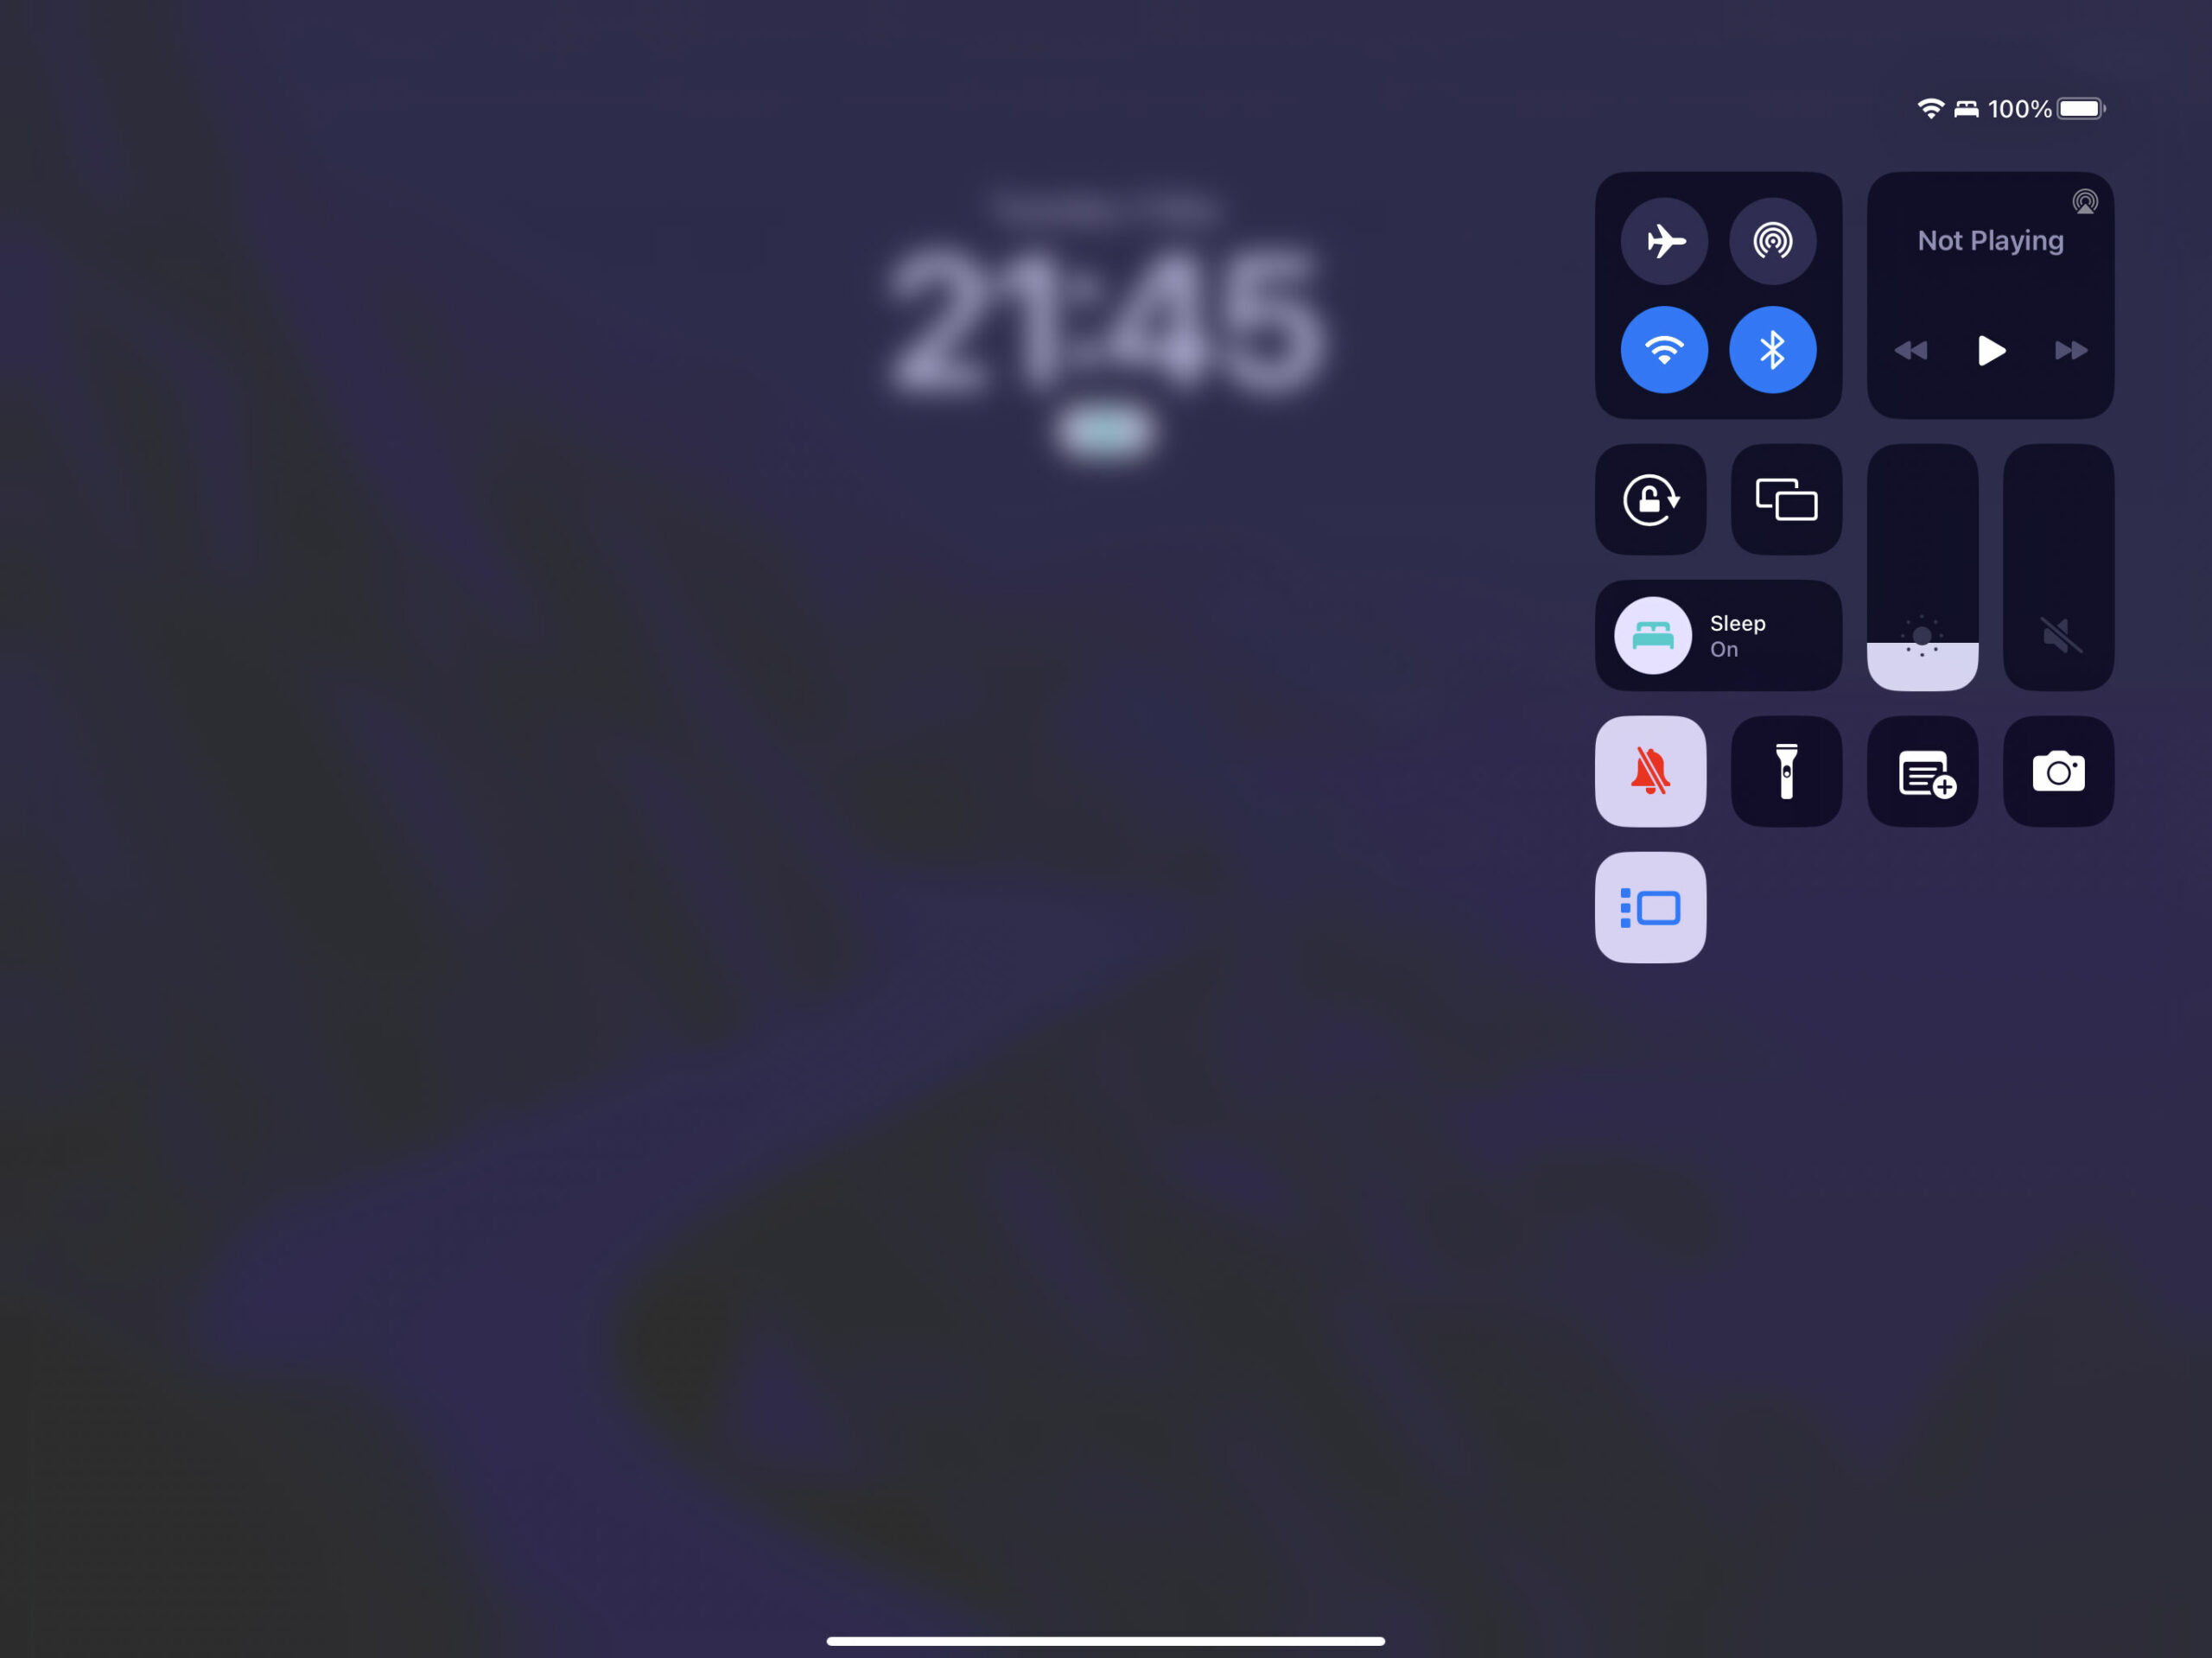
You can also enable or disable Stage Manager from the Control Centre
- Swipe down from the edge at the right corner
- Tap to toggle Stage Manager on / off
- If you don’t see the shortcut go to Settings App > Control Centre, then add Stage Manager into Included Controls.
- Long press on the Stage Manager icon reveals Recent Apps and Dock settings, pretty neat!
How to use Stage Manager in iPadOS
For every app that you open (up to 4), a thumbnail gets created on the left side. These act as quick shortcuts to jump between apps. If you don’t see this, it may be hidden by the hide Recent Apps setting in previous section so swipe in from the left edge to reveal.
You can resize the app’s floating window by tapping and swiping the corner indicator at the bottom right corner.
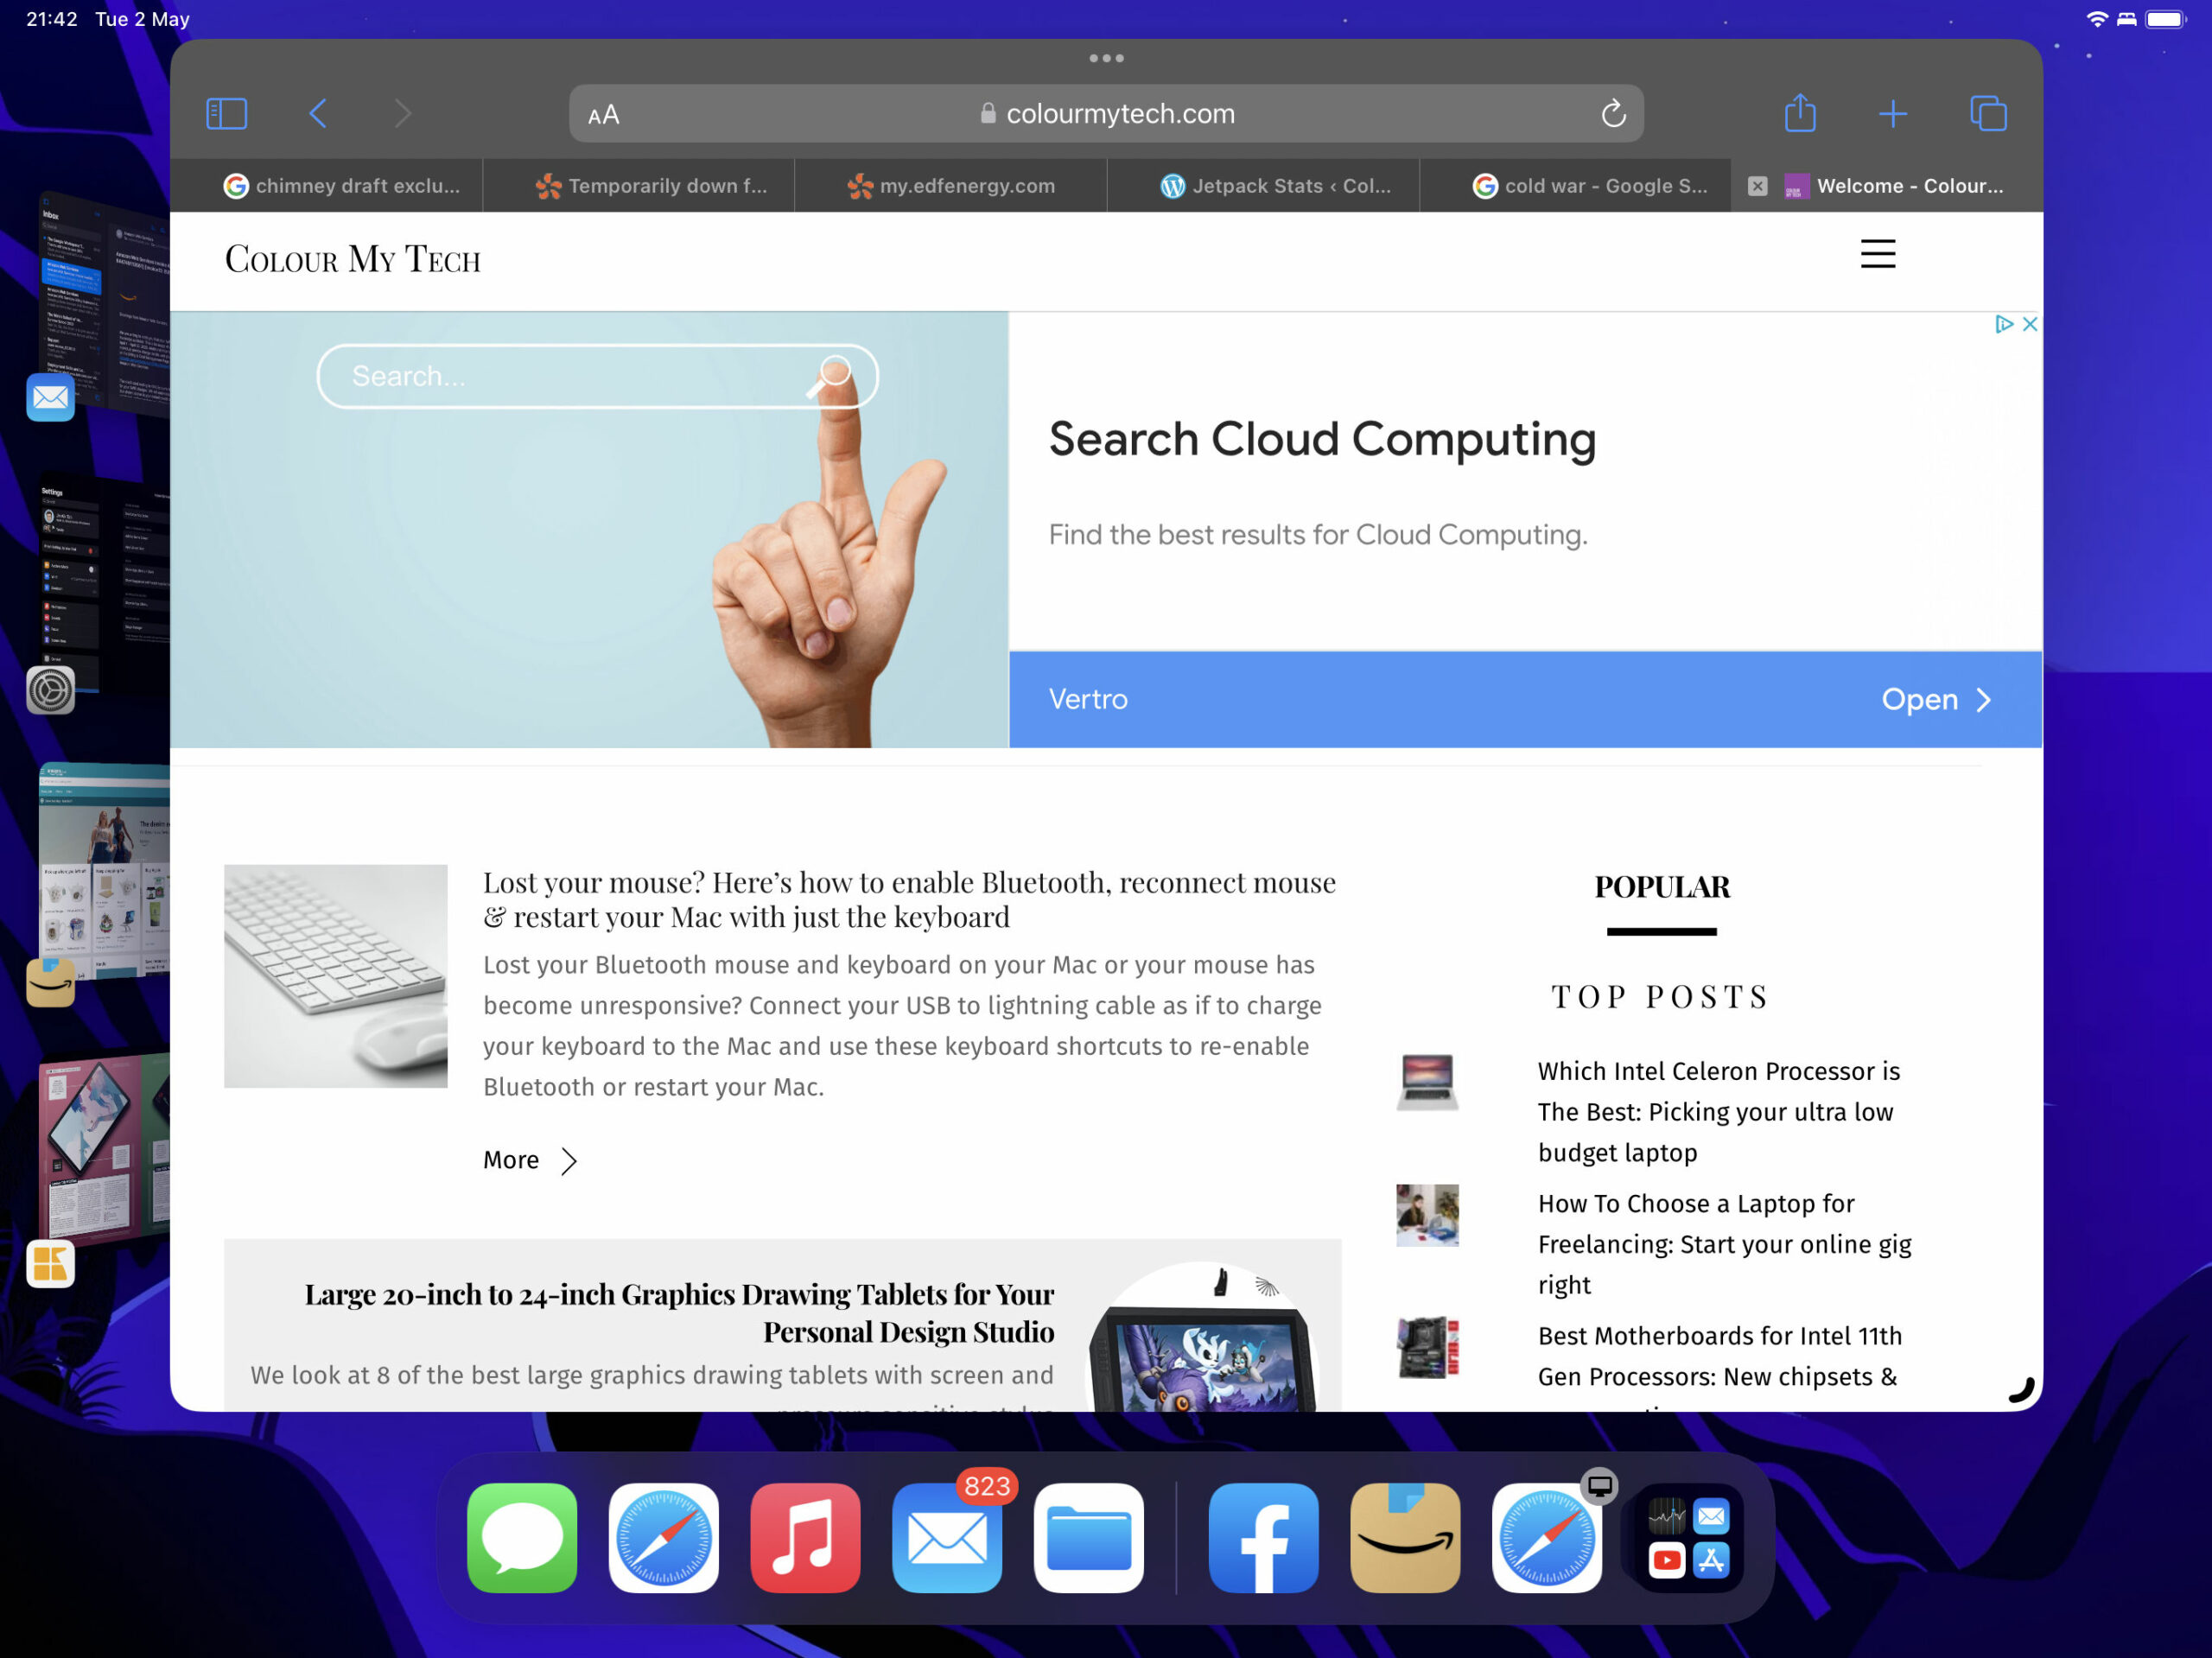
To group your apps, tap on the first app thumbnail you wish to group so it appears in the middle of the screen then drag the second app you wish to group from the left side to the middle. Repeat for more apps. Grouped apps automatically readjust to show overlapped apps so no windows are hidden.
However, if you start enlarging the windows on top, some apps underneath can be hidden. Also even with Recent Apps enabled, the thumbnails on the left side can go away to give you more room on the screen. To bring it back, swipe in from the left edge.
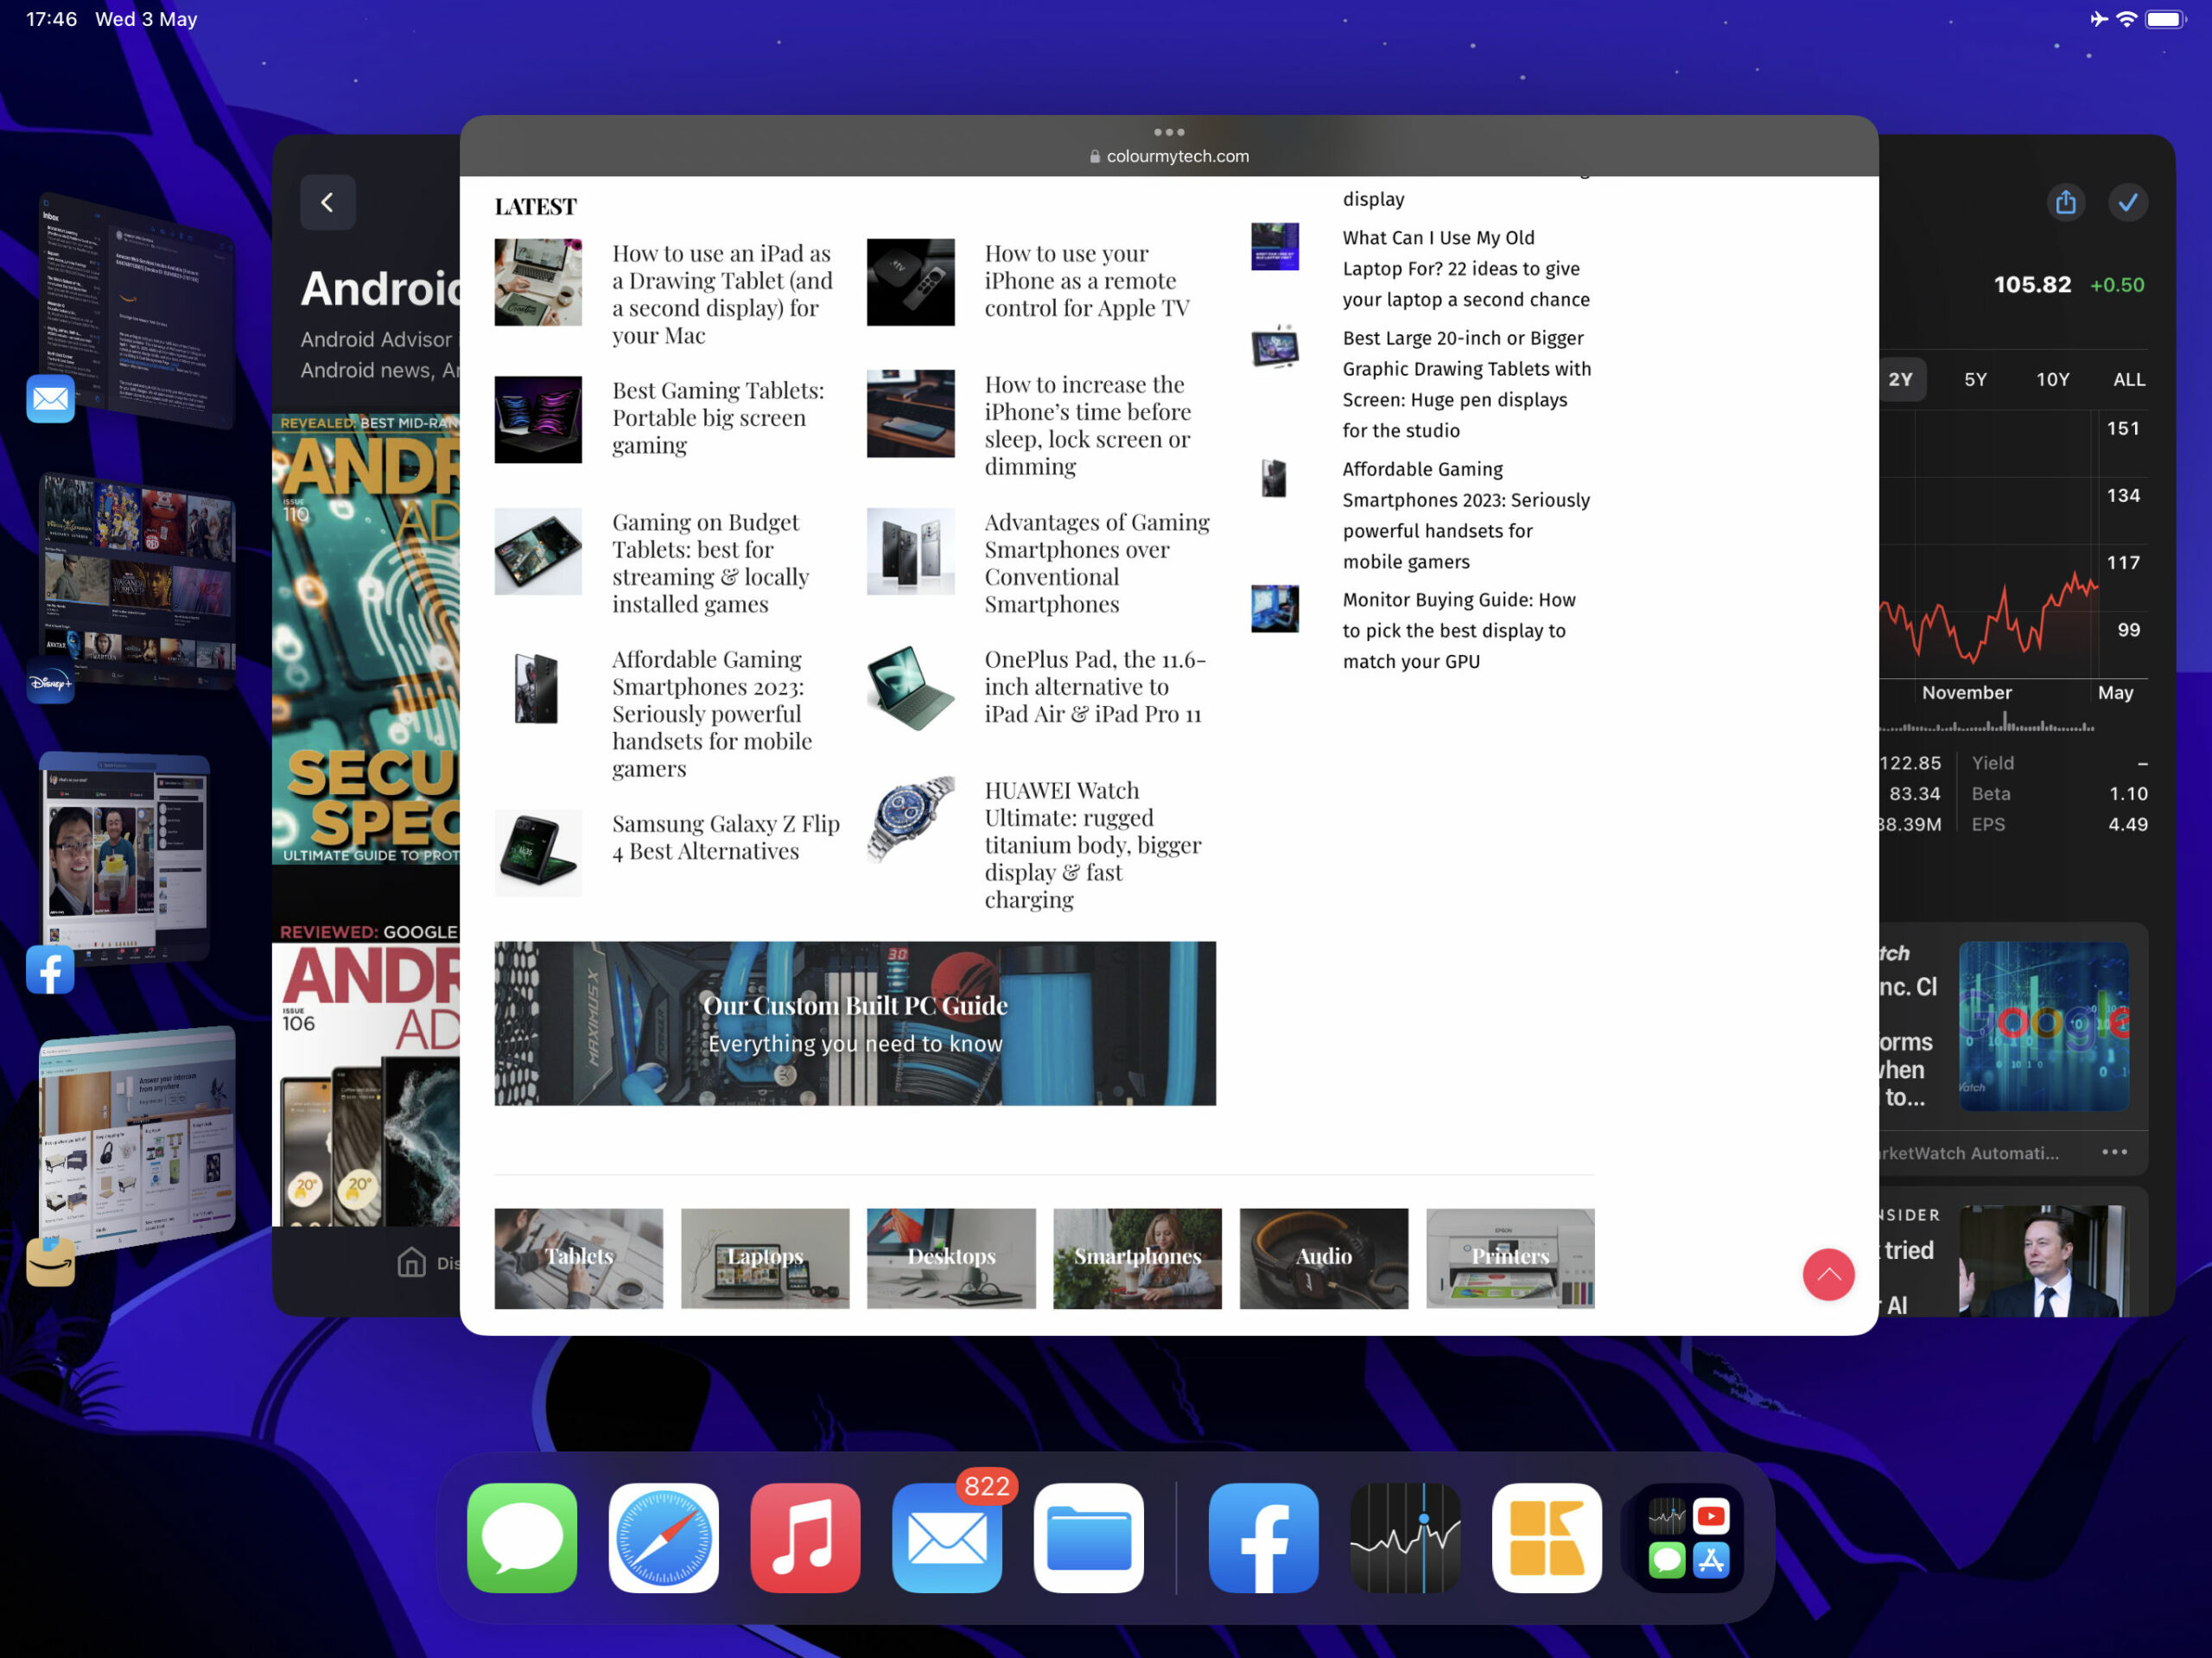
To ungroup an app, tap on the three horizontal dots at the top middle of the app window then choose Minis from the pop-up menu. This removes the app from the group.
Due to screen real estate limitation, we can just about cope with 4 apps in a group. Losing clear view of an app due to stacking or overlapping can be a multitasking nightmare. You have to drag app windows around to reveal other apps in the stack.
iPad Models that Support Stage Manager
We leave you with iPad models that support Stage Manager.
- iPad Pro 12.9-inch (3rd generation and later)
- iPad Pro 11-inch (1st generation and later)
- iPad Air (5th generation)
However, in order to move apps and windows to an external display, only more recent iPads with iPadOS 16.2 or later support this. These are Apple tablets powered by Apple M1 silicon or higher. See list below.
- iPad Pro 12.9-inch (5th generation and later)
- iPad Pro 11-inch (3rd generation and later)
- iPad Air (5th generation)
