DIY Solar-Powered Charger: Upcycle Old Tech for Green Energy
Imagine turning your old, unused gadgets into a sustainable powerhouse that charges your devices using the sun’s energy. Sounds like a dream, right? With a little creativity and some basic tools, you can upcycle old tech into a DIY solar-powered charger, giving new life to forgotten electronics while embracing clean, renewable energy.
E-waste is growing at an alarming rate and the demand for sustainable solutions is higher than ever, this project is more than just a fun weekend activity—it’s a step toward a greener future. By repurposing old tech and harnessing the power of the sun, you’re not only reducing waste but also taking control of your energy consumption.
Let’s transform your outdated gadgets into a eco-friendly charging station that’s as good for the planet as it is for your devices.
What You’ll Need for Your DIY Solar-Powered Charger
Before you start building, it’s important to gather the right materials. The beauty of this project is that many of the components can be sourced from old or broken gadgets you already have lying around. For starters, raid your drawers for unused power banks, USB cables or portable chargers—these will provide the foundation for your solar-powered creation.
You’ll also need a small, portable solar panel, which can be easily found online or at your local electronics store. Don’t forget basic tools like a soldering iron, wire cutters, and electrical tape to help you assemble everything. For the casing, get creative with recyclable materials like an old plastic container, wooden box, or even a sturdy tin can.
Finally, if you’re new to working with electronics, keep safety in mind: wear gloves, work in a well-ventilated area, and double-check your connections to avoid any mishaps. With these materials in hand, you’re ready to start building your very own green energy charger!
List of materials:
- Lithium-ion battery packs from discarded laptops or power banks.
- USB charging circuits from broken adapters or power banks, USB cables, or portable chargers.
- Solar panel (small, portable, and affordable options). This can be from garden lights, old calculators or old gadgets.
- Basic tools (soldering iron, wire cutters, screwdrivers, multimeter, glue gun etc.).
- Recyclable casing (e.g., an old plastic container or wooden box).
Step-by-Step Build Guide
In this section, we’ll walk through the process of building a functional solar-powered charger using upcycled components. Be sure to take safety precautions, especially when working with lithium-ion batteries and electrical components.
Step 1: Sourcing and Testing Solar Panels
Look for old solar panels from:
- Broken solar garden lights.
- Outdated solar-powered calculators or gadgets.
- Defunct solar phone chargers.
- You can also consider buying portable solar panels, small foldable units available at different power ratings.
Use a multimeter to test the output voltage and current of each panel.
If the output is too low, consider combining multiple panels in series (to increase voltage) or parallel (to increase current).
Step 2: Extracting and Refurbishing Batteries
- Disassemble an old laptop battery pack or power bank to salvage 18650 lithium-ion cells.
- Use a multimeter to check the voltage of each cell:
- Cells above 3.0V are likely reusable.
- Cells below 3.0V may be degraded and should be discarded safely.
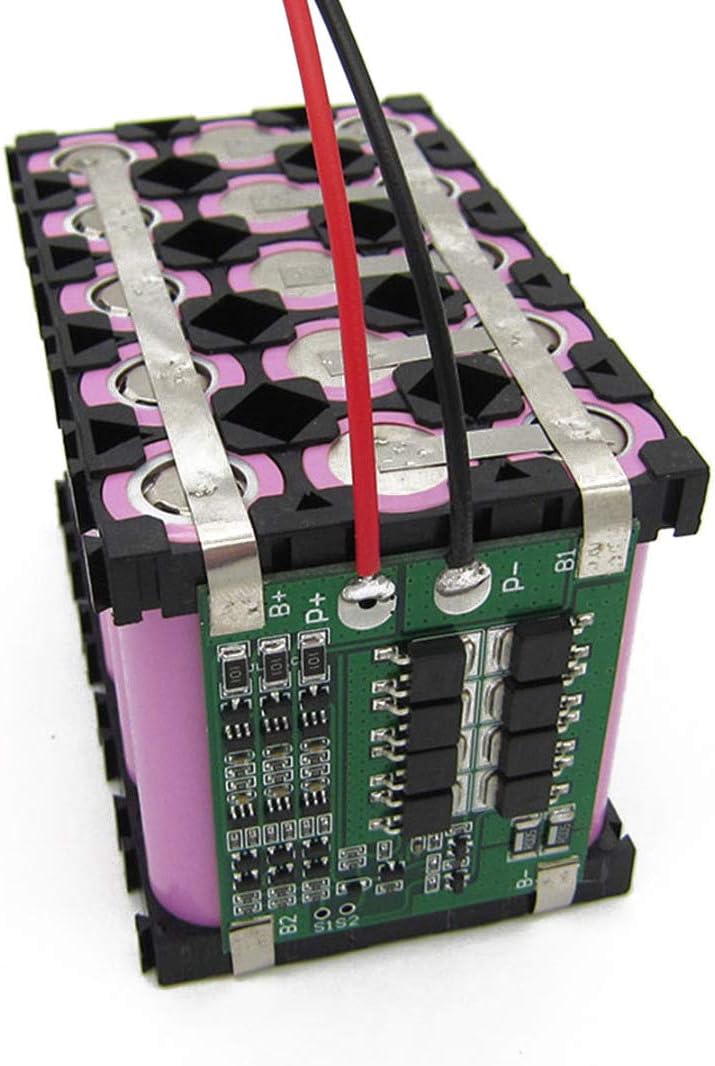
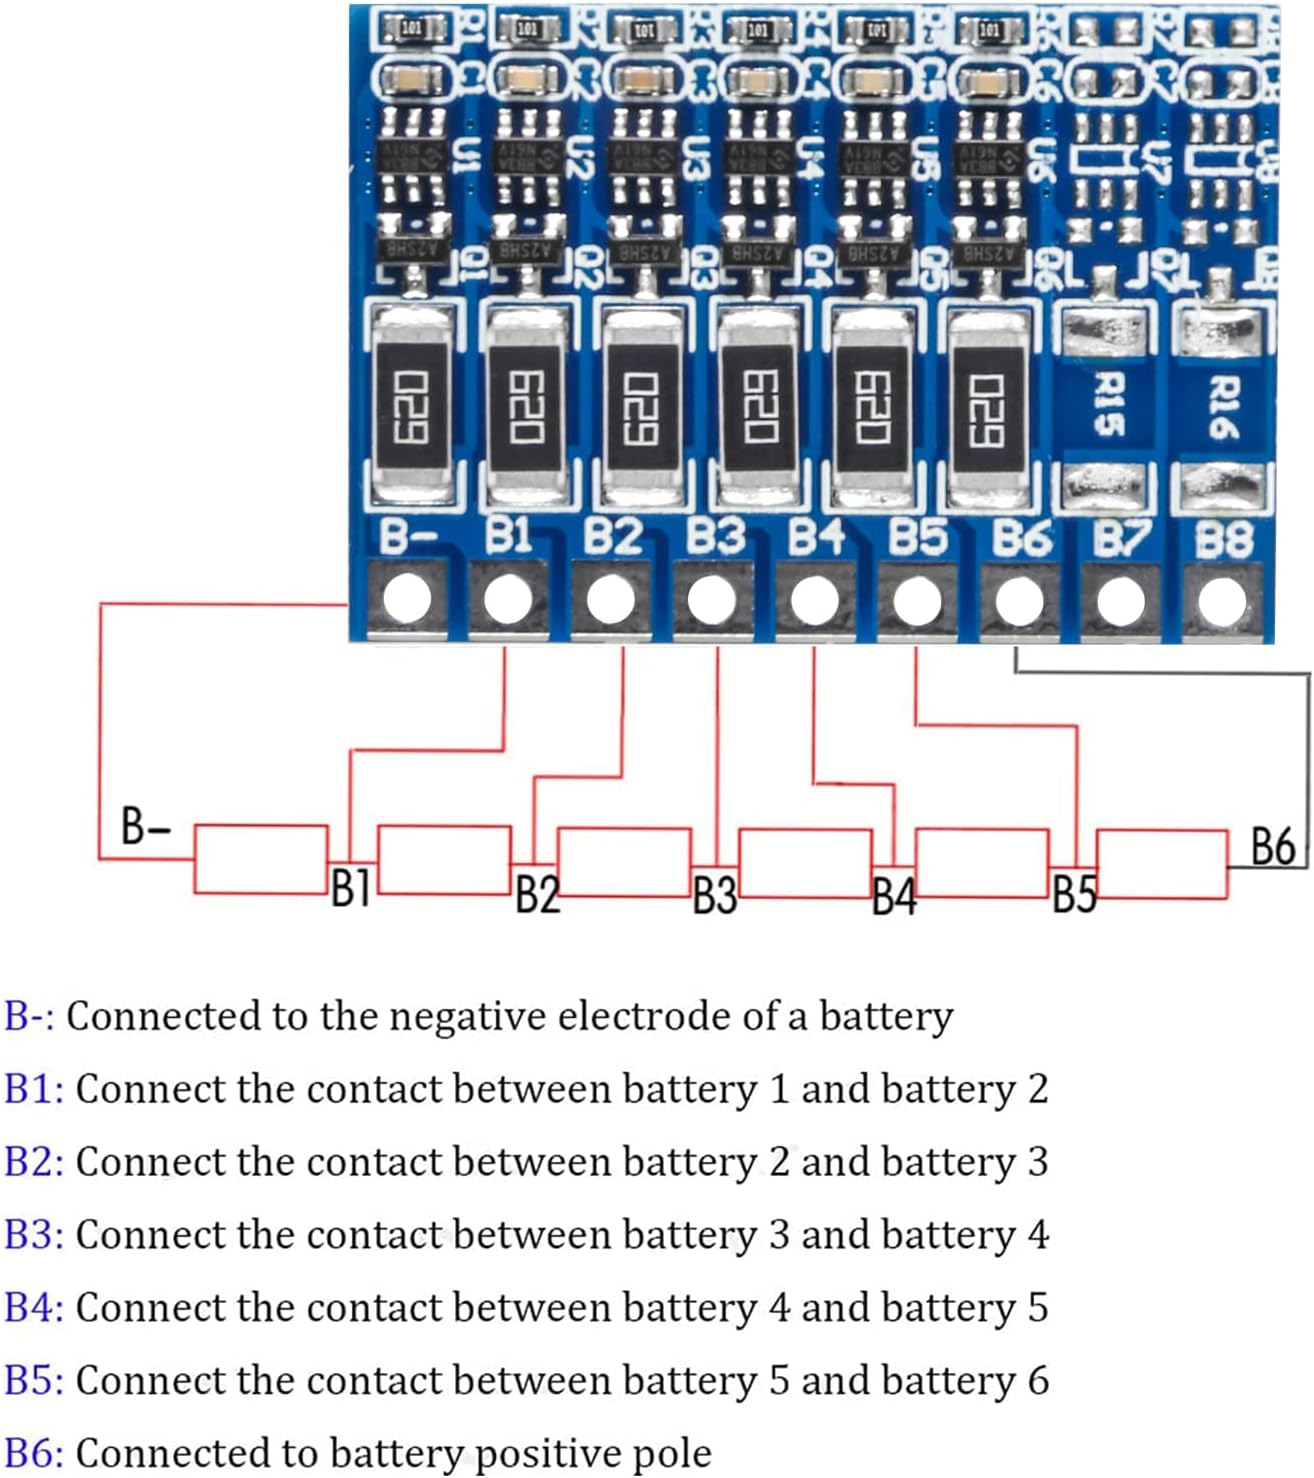
- Use a battery management system (BMS) or charge controller to regulate and protect the batteries, see typical wiring image below. These boards provide protection from short circuit, overcharge, over discharge and over current.
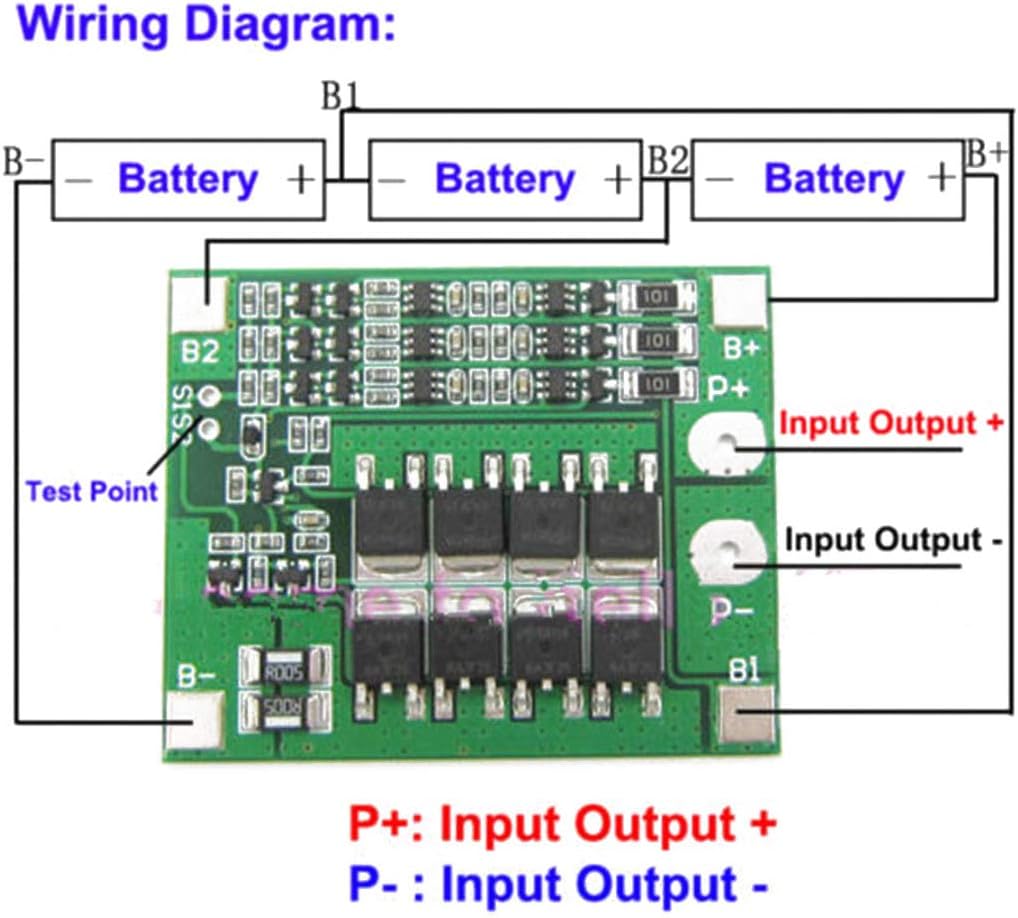
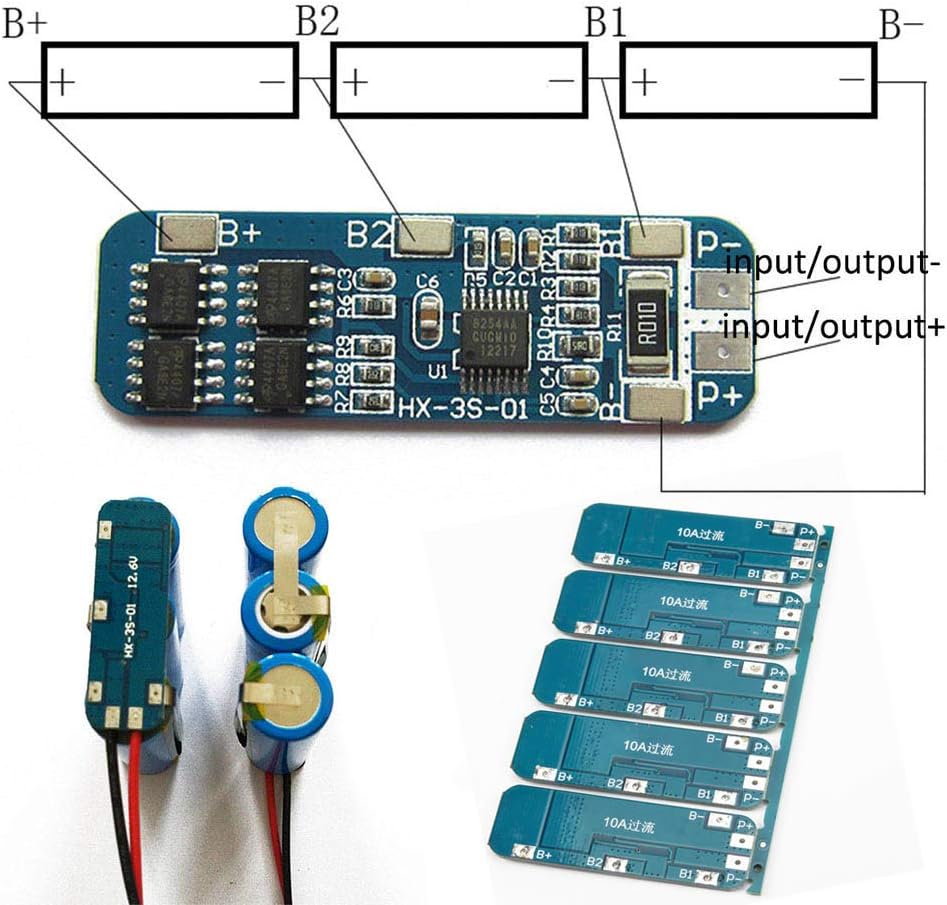
Different modules connect to 18650 batteries differently, here is another Protection Board BMS and wiring.
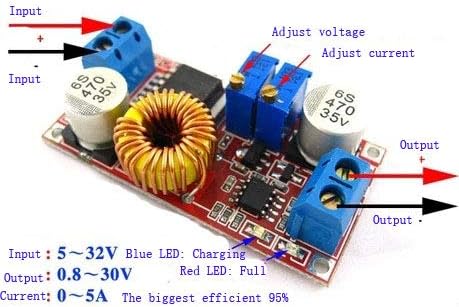
Step 3: Assembling the Voltage Regulation and USB Output Circuit
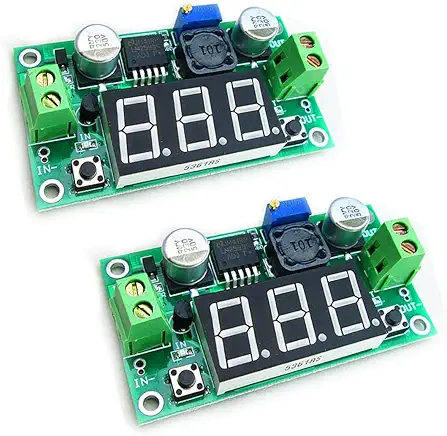
- Use a DC-DC step-down converter (buck converter) to regulate the voltage to 5V USB output.
- Solder the connections:
- Solar panel output → Charge controller → Battery pack.
- Battery pack → Voltage regulator → USB output module.
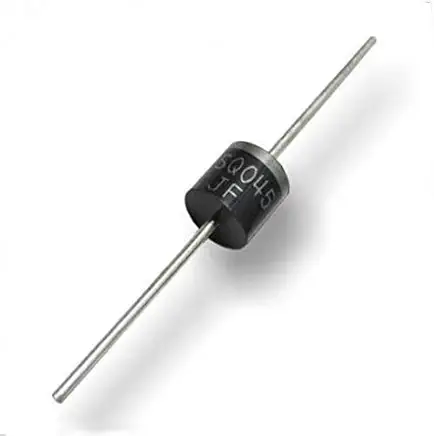
- Add a blocking diode to prevent reverse current flow from the battery to the solar panel at night.
Step 4: Enclosure Design and Weatherproofing
Repurpose an old plastic container, wooden box, metal tin (remember to insulated), or 3D-printed case for housing the circuit. Drill or cut holes for the USB port, solar panel input, and battery ventilation. Use hot glue, silicone sealant, or epoxy to secure components and weatherproof the case.
Step 5: Final Assembly and Testing
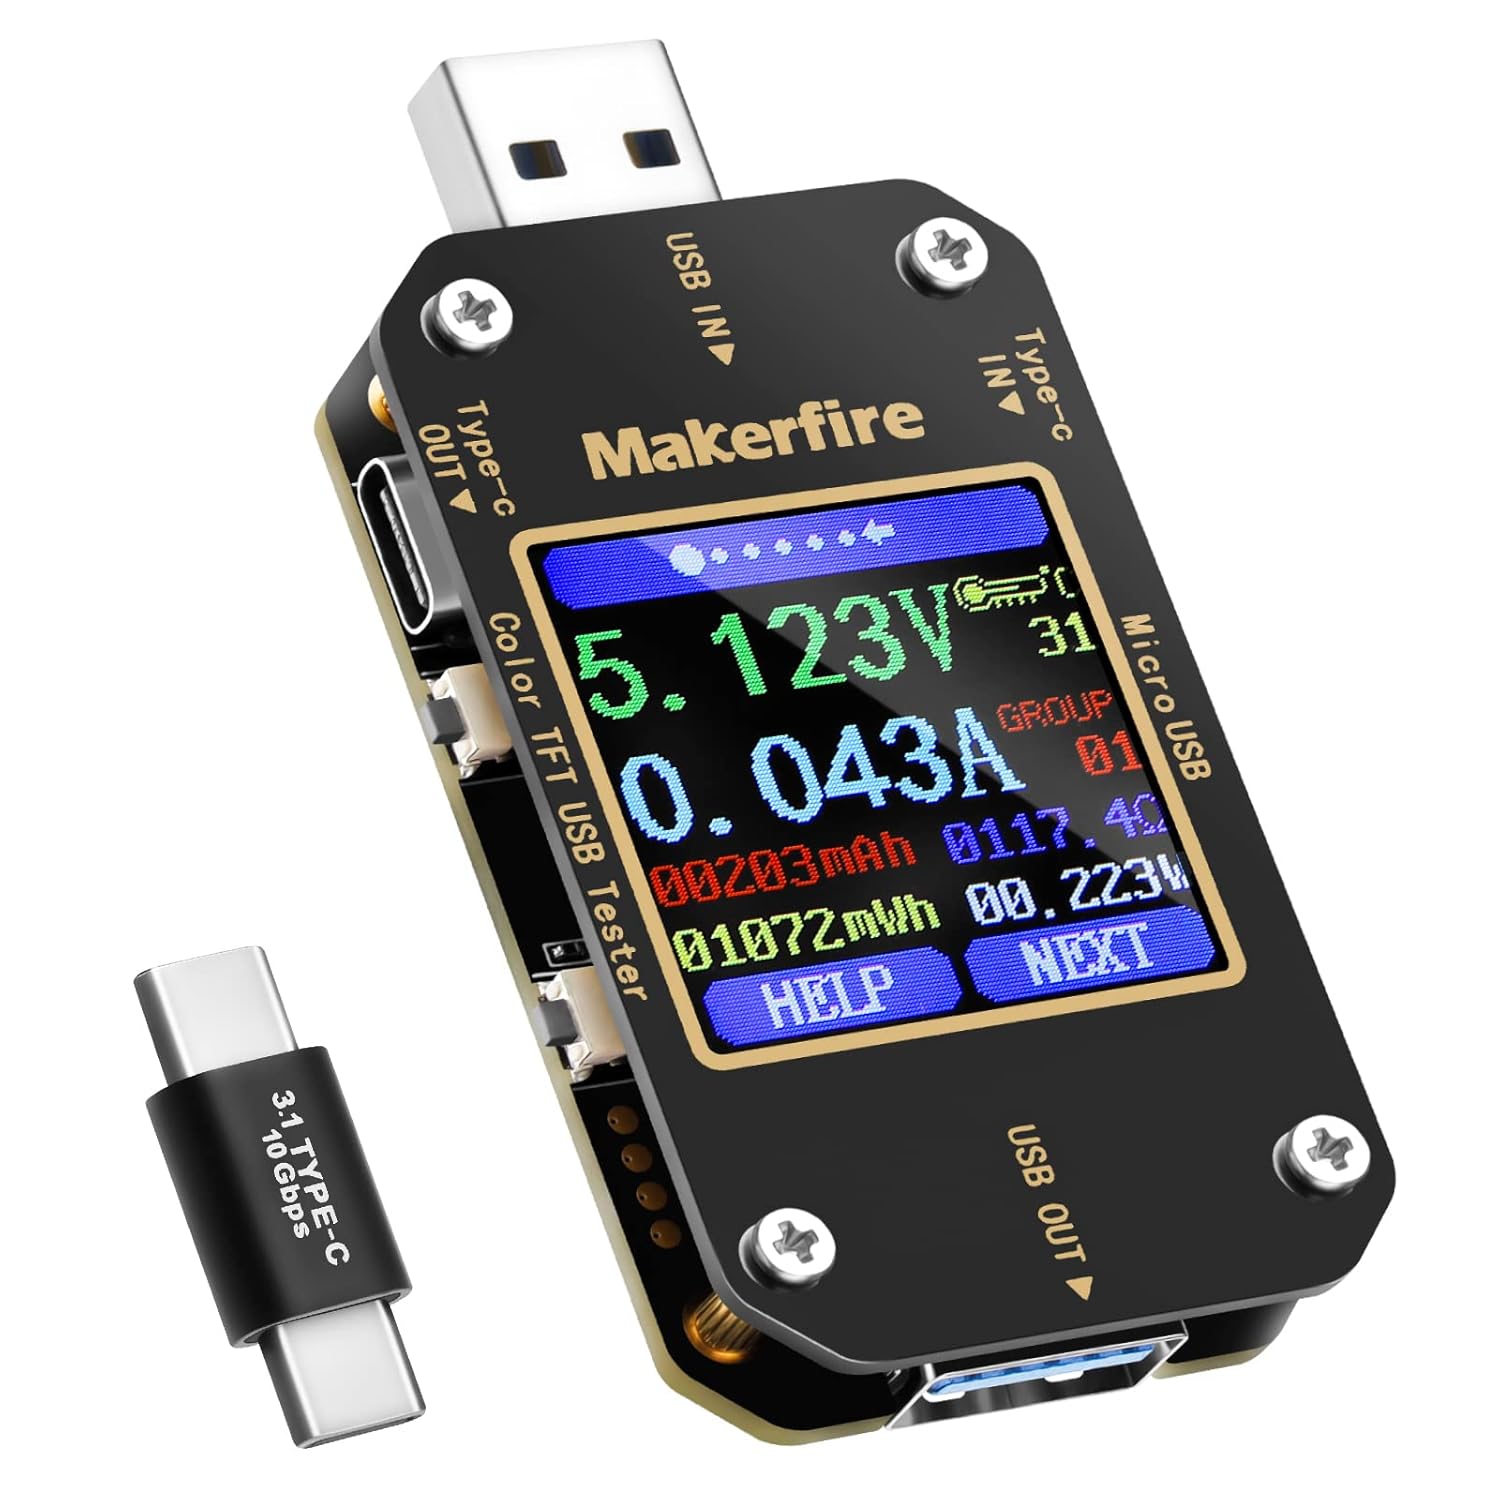
Assemble all components inside the enclosure and ensure secure connections. Place the solar panel under direct sunlight and monitor the charging process using a USB power meter. Test the charger with a smartphone, power bank, or small device. If charging is too slow, adjust the panel configuration or use a higher-efficiency voltage regulator.
Optimising Performance and Safety
Now that you have a working DIY solar-powered charger, let’s explore ways to enhance its efficiency, longevity, and safety. These optimisations will help ensure reliable performance while protecting your batteries and devices. Note that these are steps to optimise your setup. Most components recommended here are already incorporated in the step-by-step guide above.
1. Adding a Charge Controller for Battery Protection
Lithium-ion batteries require controlled charging to prevent overcharging, over-discharging, and thermal runaway (overheating). A solar charge controller (MPPT or PWM) regulates voltage and current from the solar panel to the battery, preventing damage.
Alternative: If using 18650 lithium-ion cells, integrate a Battery Management System (BMS) to balance charging and prevent overheating. BMS boards are available for multiple cells, 1S, 2S, 3S, 4S, 5S and 6S (a version of this is show below) depending on the number batteries in use.
2. Improving Efficiency with Better Panel Configurations
If your solar panel output is too low, rewire them: Series connection: Increases voltage (useful for low-voltage panels). On the other hand, Parallel connection: Increases current (improves charging speed). The other thing to to experiment is with tilt angles: Positioning your panel at the right angle towards the sun maximises energy capture.
3. Ensuring Overcharge and Short-Circuit Protection
To avoid overcharge or short-circuit, use a voltage regulator (e.g., a DC-DC buck converter) to maintain a stable 5V output for USB charging. Add a Schottky diode to prevent current from flowing back into the solar panel at night. Last but not least, install a fuse or polyfuse (self-resetting fuse) to protect against short circuits.
4. Heat Dissipation and Ventilation
Lithium-ion batteries can overheat if enclosed in a sealed box. Drill ventilation holes or use a metal enclosure as a heatsink. Also, avoid placing the charger in direct sunlight for long periods—mount the panel separately if possible.
5. Testing and Monitoring for Long-Term Reliability
To test and monitor for long-term reliability, use a USB power meter to check output voltage and current while charging devices. If the charging speed is too slow, troubleshoot by:
- Testing individual panel outputs.
- Checking for loose solder joints or damaged batteries.
Consider adding an LCD or LED indicator to display battery status and charge level.
By optimising your DIY solar charger, you can extend its lifespan, improve efficiency, and ensure safe operation—all while making the most of renewable energy.
Building a Better Future
Building your own DIY solar-powered charger is more than just a fun and rewarding project—it’s a meaningful step toward a greener, more sustainable lifestyle. By upcycling old tech and harnessing the power of the sun, you’re not only reducing e-waste but also taking control of your energy consumption in an eco-friendly way.
This project proves that sustainability doesn’t have to be complicated or expensive; sometimes, it’s as simple as repurposing what you already have and adding a touch of innovation. So, what are you waiting for? Grab those old gadgets, gather your tools, and start building your very own green energy charger.
And once you’re done, don’t forget to share your creation with the world—snap a photo, post it on social media, and inspire others to join the movement toward a cleaner, brighter future. Together, we can turn small steps into big changes, one solar-powered project at a time. Happy building!