How to enter Split View to tile two apps side-by-side on a Mac
On Macs with 5K or even 4K displays, you can easily fit two browser windows side-by-side. The same can be applied to apps. Here are the steps to split your screen into two on a Mac to enhance your workflow and multitasking.
I am a sucker for making sure that my active apps fill all the available space on the desktop. I do this for my browser windows and productivity apps. With the 5K display on my iMac, I can get two full web page views with two Safari browser windows side-by-side or a document and spreadsheet side-by-side. The fact that I have been manually eyeing the webcam, using it as the centre point to split the screen and resize my open windows all this while is nothing short of embarrassment. Not when you can do it easily and quickly with just a couple of clicks. Enters Split View!
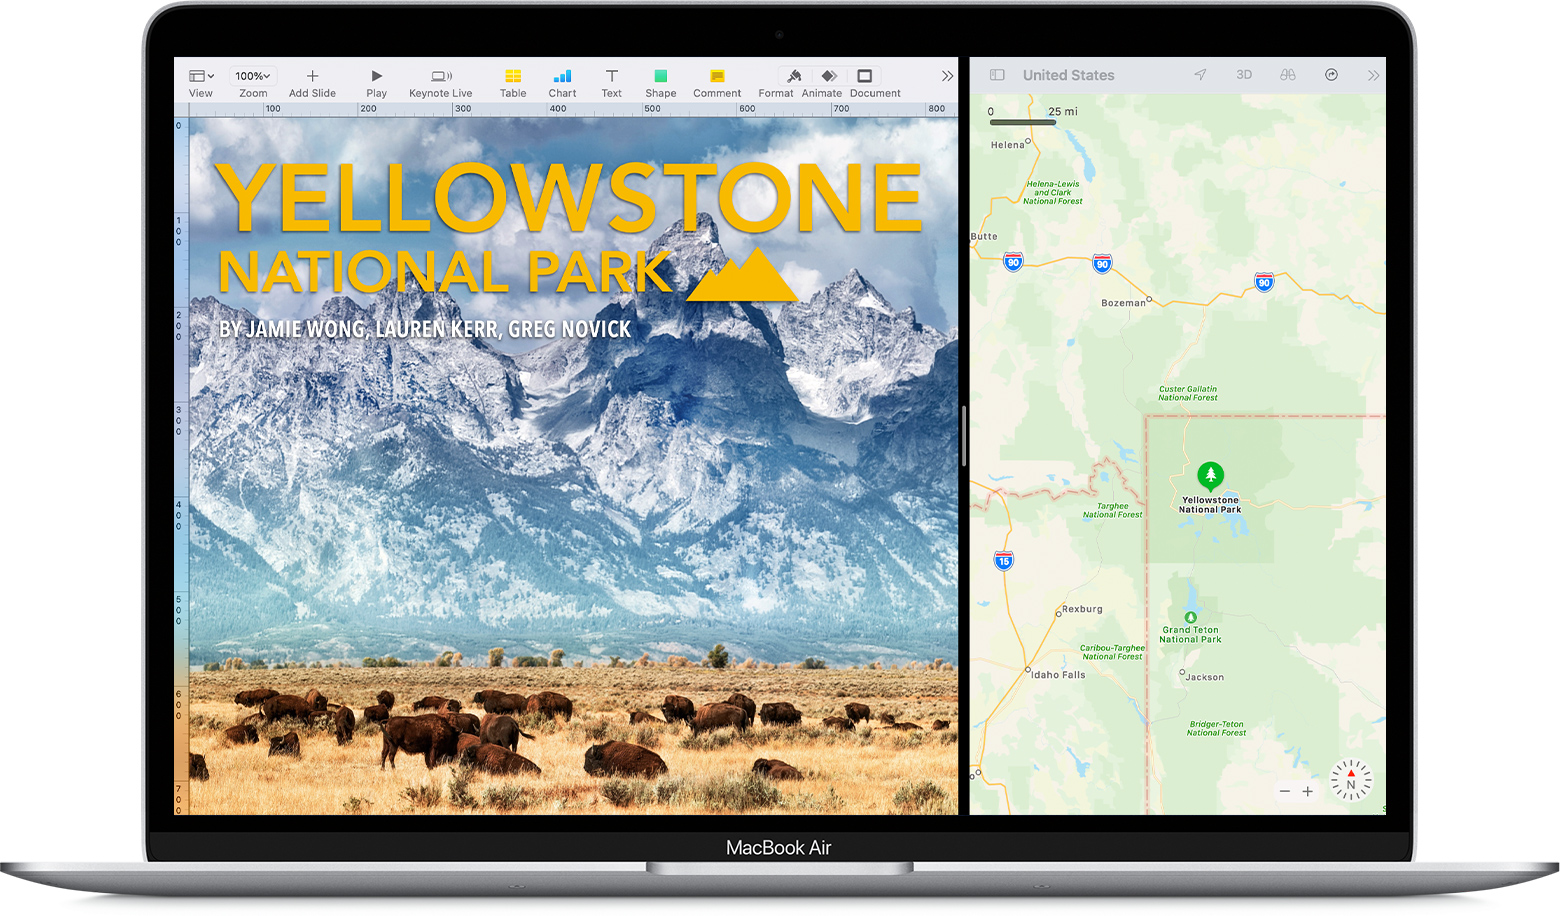
What is Split View
You may have seen this on an Android tablet or iPad, where you have two apps open and available side-by-side. This is an early attempt on the tablets to offer multitasking. But did you know that you can do the same on macOS? In fact, the feature has been around for years, since macOS 10.11 El Capitan. Although, it was difficult to get to as it involves clicking and holding on the full-screen button in the upper-left corner of a window until you enter a secret Easter egg like mode.
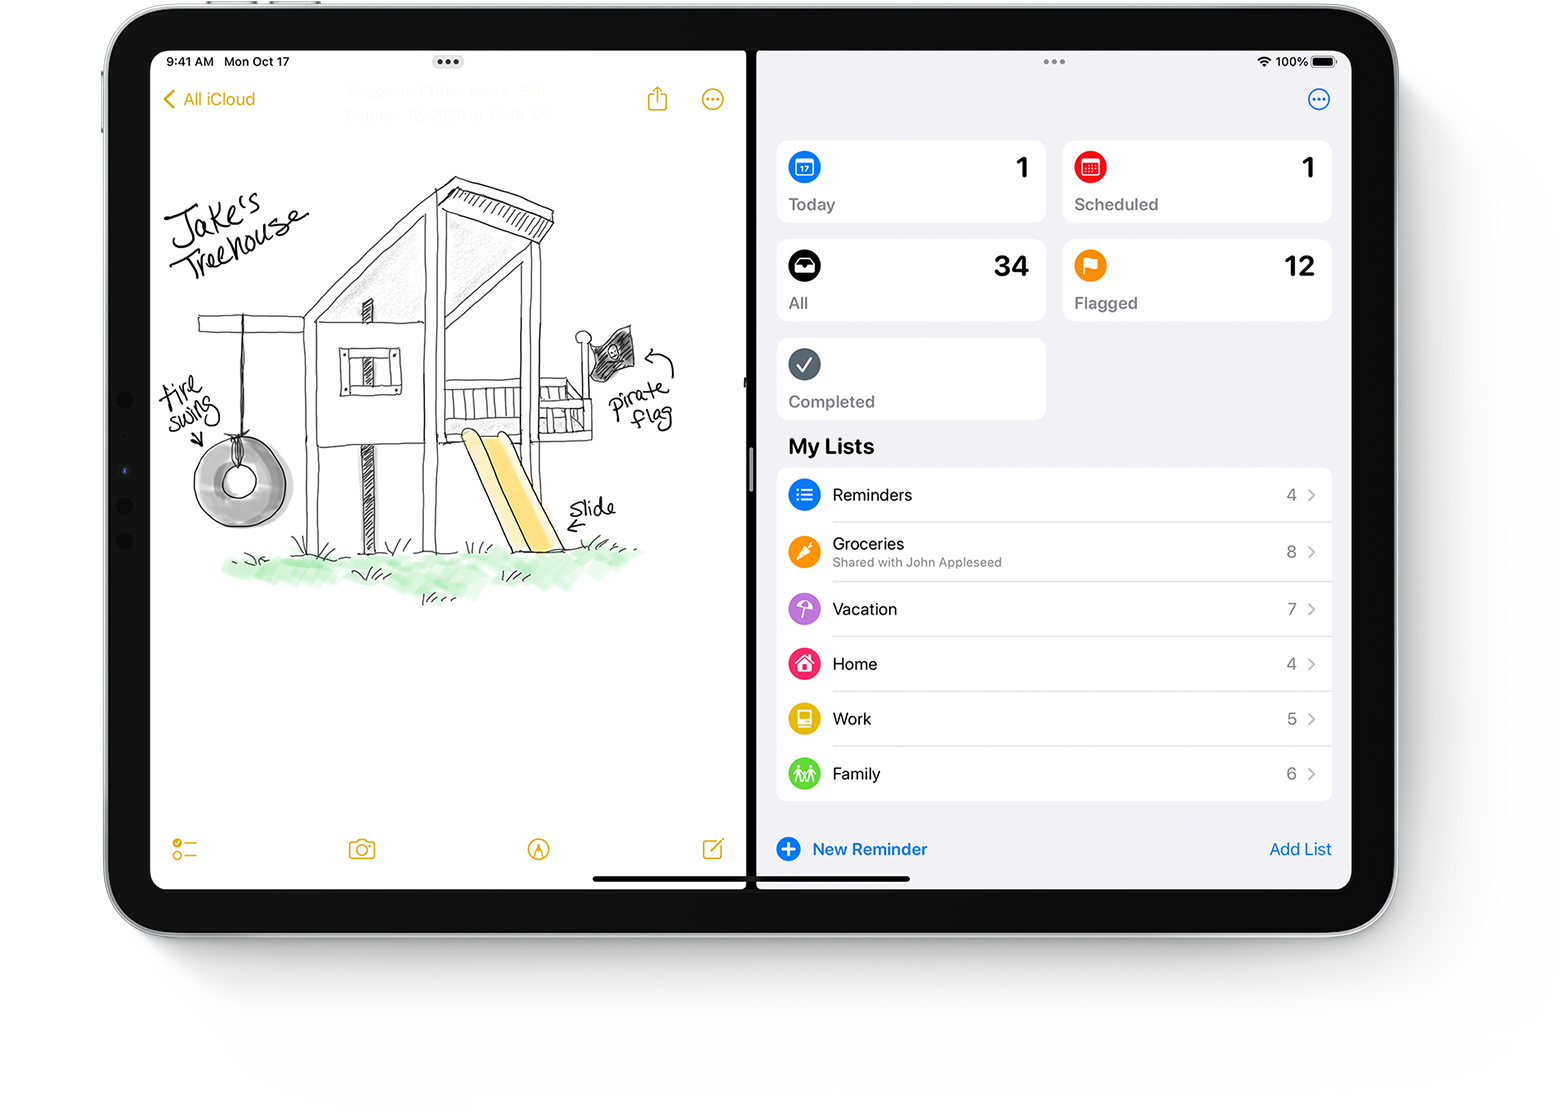
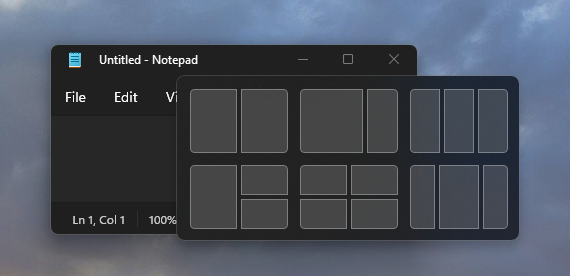
Since macOS Catalina 10.15, Apple has made it easier with a pop-up menu when you hover or click and hold down on the full-screen button as we will see in the next section. It has made the feature more obvious to users like Snap Layouts is for Windows users. The difference here is instead of arranging up to 4 apps in different formation with Snap Layouts on Windows, you only get two apps with fixed left-right layout.
How to use Split View on Mac
Some things on macOS are just not immediately obvious like Split View. To enter Split View on macOS Catalina or later here are the steps:
- Click and hold down the full-screen (green) button on the top left corner of a window. This is the third circle after the traffic light red and yellow buttons found on an active window.
- A pop-up menu shows three options, choose either to Tile Window to Left or Right of Screen.
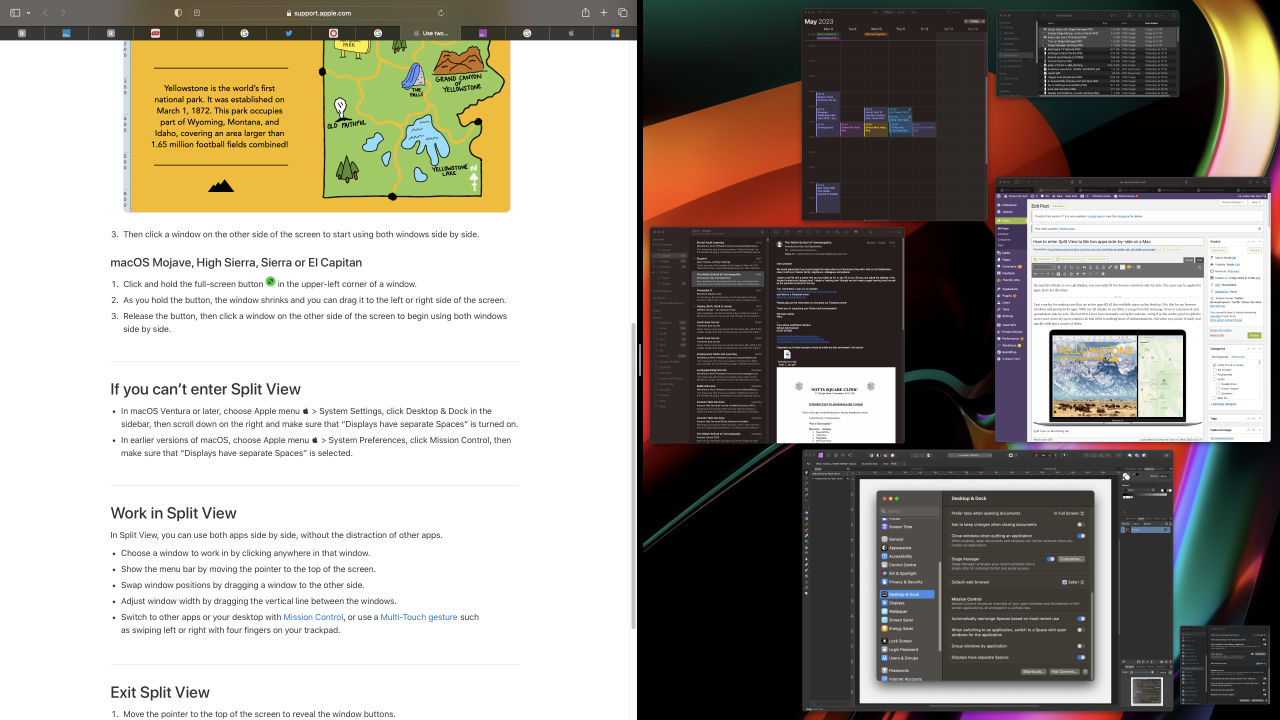
- This first window then fills the chosen side and it then presents the other open apps in a way similar to Mission Control so you can pick the second app to fill the other side.
- Click on your chosen 2nd app.
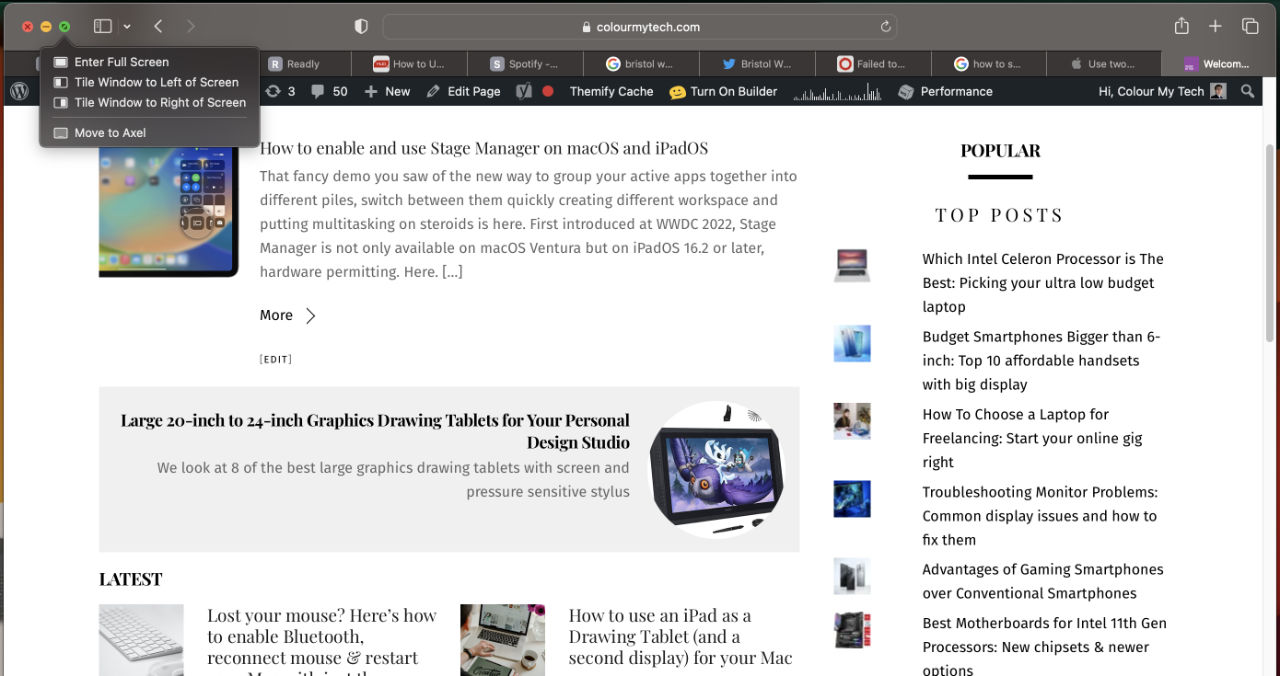
The choices in this pop-up menu are
- Enter Full Screen
- Tile Window to Left of Screen
- Tile Window to Right of Screen
- and sometimes, Remove Window from Set
- and if you have a compatible iPad signed in to the same Apple ID, you might see it on the list that lets you move the window there. See screenshot below.
How to enable Split View
Only use the steps here if you can’t enter Split View.
- Click the Apple icon on the top left corner then System Settings
- Click Desktop & Dock in the left sidebar
- In the main pane, scroll down to Displays have separate Spaces and toggle this on. This is found under the Mission Control section found by scrolling down to the bottom.
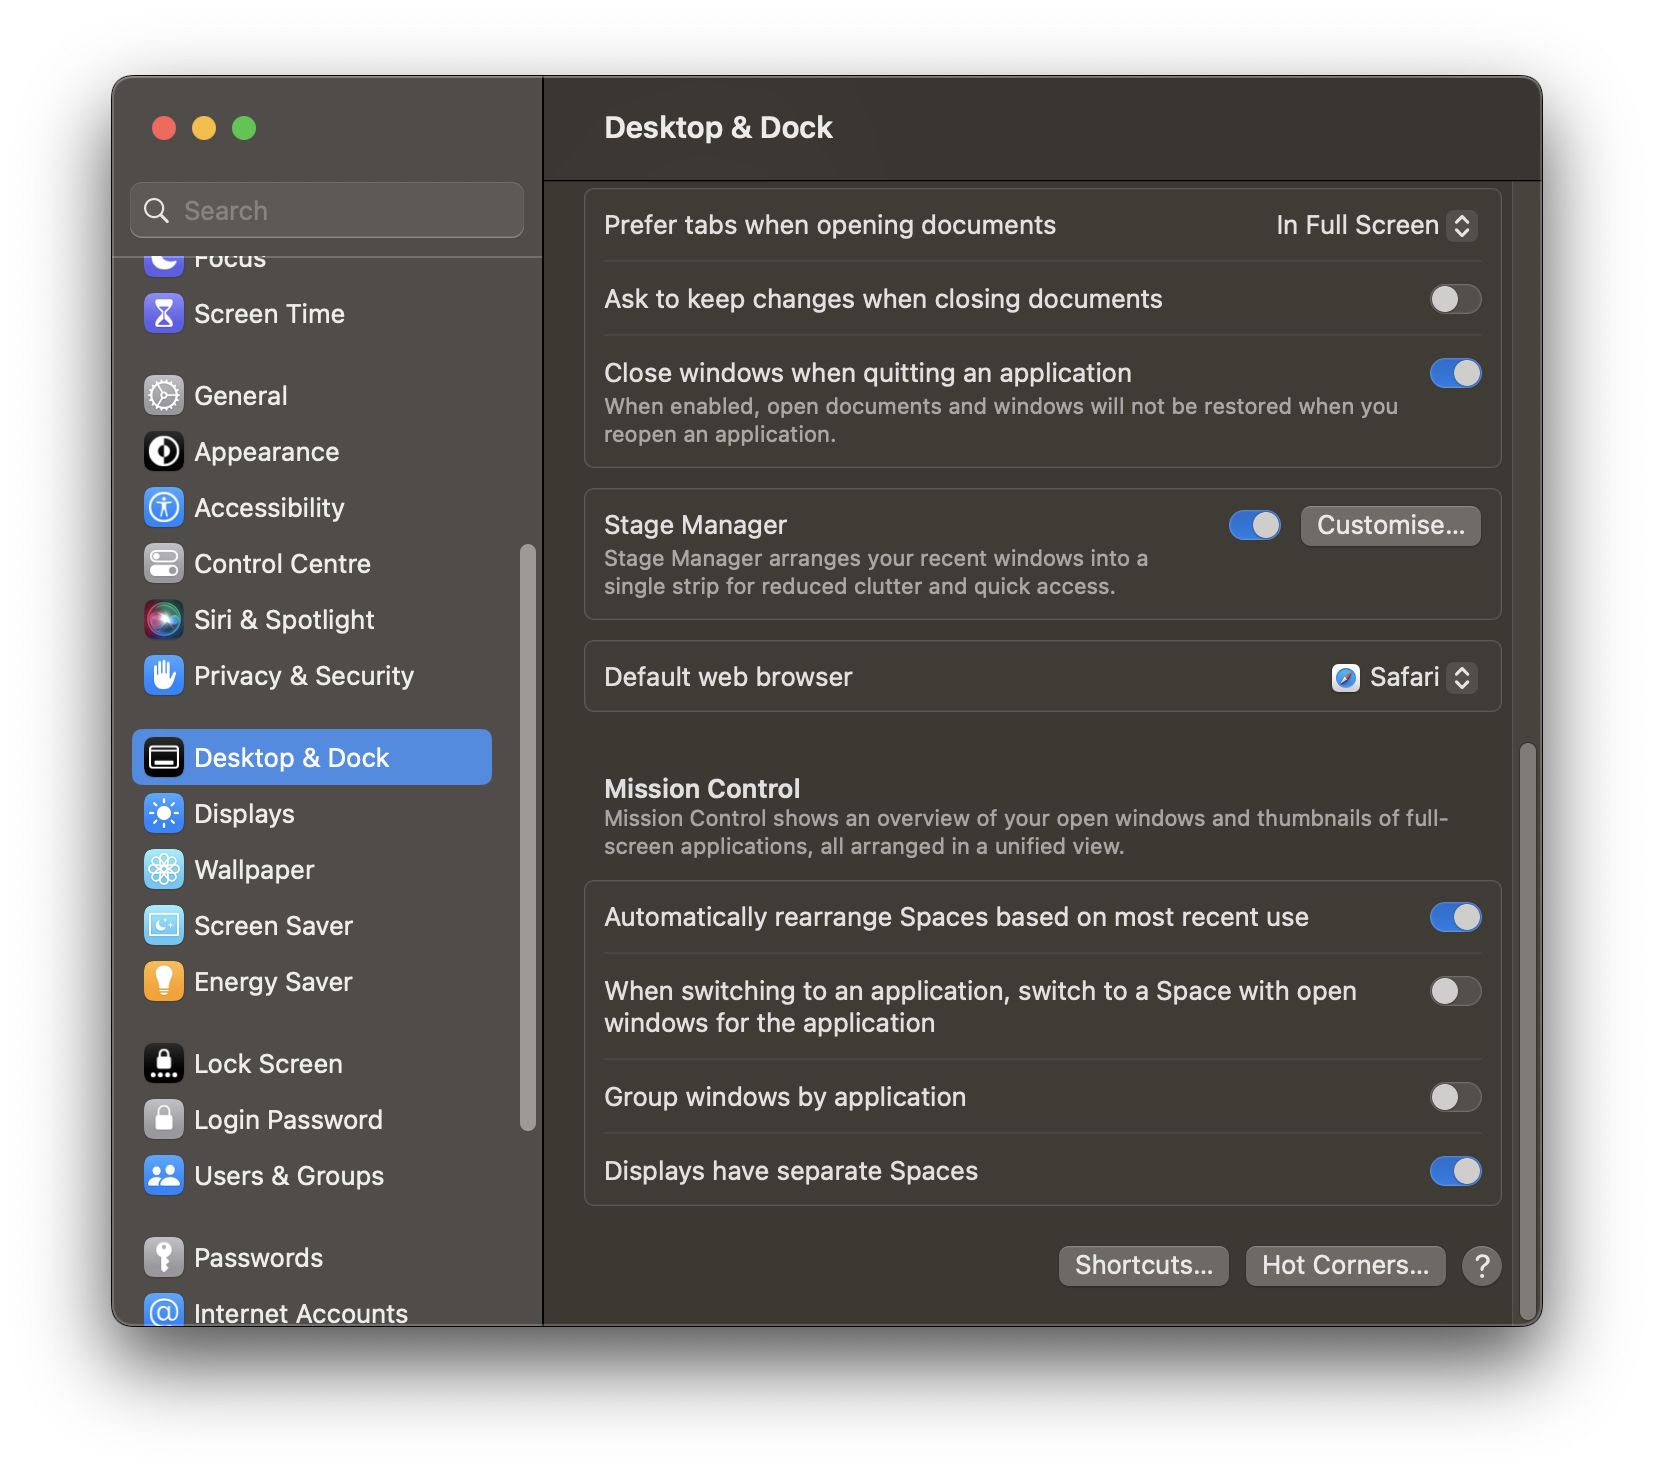
You can find the same settings on earlier macOS using Apple icon > System Preferences > Mission Control then select Display have separate Spaces.
How to work in Spilt View
Entering Split View is easy part, just follow the steps above. Getting out of it or trying to switch app can be tricky to start but you will soon get the hang of it. Here are some pointers:
- Split View is in effect full screen view for two apps as the menu bar and dock are hidden
- Move your cursor to the top of the window to reveal the menu bar
- Move your cursor to the bottom of the window to reveal the dock
- Click on the window you wish to work on to make it the active window
- Click and drag the divider in the middle to resize the width ratio of the two windows
- Swap sides between the two apps by dragging the top bar of a window to the opposite site
- Switch to other apps using the Mission Control button (F3) on your Apple Keyboard or with multi touch gesture four finger swipe on the trackpad.
When in Split View Mode
- the full screen (green) icon’s pop-up menu changes. Move your cursor to the top of the window reveals the traffic light buttons (red – yellow – green). Hover or long click on the green icon gives the following options. Here you can Replaced Tiled Window, Move Window to Desktop or Make Window Full Screen.
To Get Out of Split View
Last but not least, to get out of Split View mode, use the steps here:
- Move the cursor to the top of the window
- This reveals the traffic light window buttons
- Click on the full-screen (green) button in either app to exit Split View
- The quirk here is that the other window goes full-screen and jumps into its own new desktop
- You can find it by invoking Mission Control
Final Thoughts
In my experience, Split View can be a little buggy and unpredictable. When you exit a tiled window, the opposite window goes Full Screen and disappears into its own desktop. You will have to invoke Mission Control and then move your cursor to the top to reveal the new desktop it resides it. Also, Replace Tiled Window or Move Window to Desktop can be unpredictable too. It sometimes work and sometimes doesn’t. Going in and out of Split View with two Safari browser windows, I lost access to one of the windows with all my tabs completely. If you only have two apps to work on then Split View will be fine but if you have more apps to switch between, then it is more work than it is worth.


