How to Optimise Your PC V: Guide to Safely Overclock Your PC
Are you struggling to run games or heavy applications with an old PC? Was your processor one of the best in the market when you bought it but is now feeling a bit slow? We have a short guide on overclocking just for you.
Overclocking was once a cumbersome process involving extensive calculations and technical know how. It was something only geeks and power users resorted to in order to extract extra performance from their computers. Nowadays, however, the process has become much simpler.
Not happy with the lag you face while gaming? Here is a quick and safe guide to overclock your PC (and GPU) for that extra boost in performance. And, no it doesn’t involve putting your CPU in a block of liquid nitrogen cooled contraption.
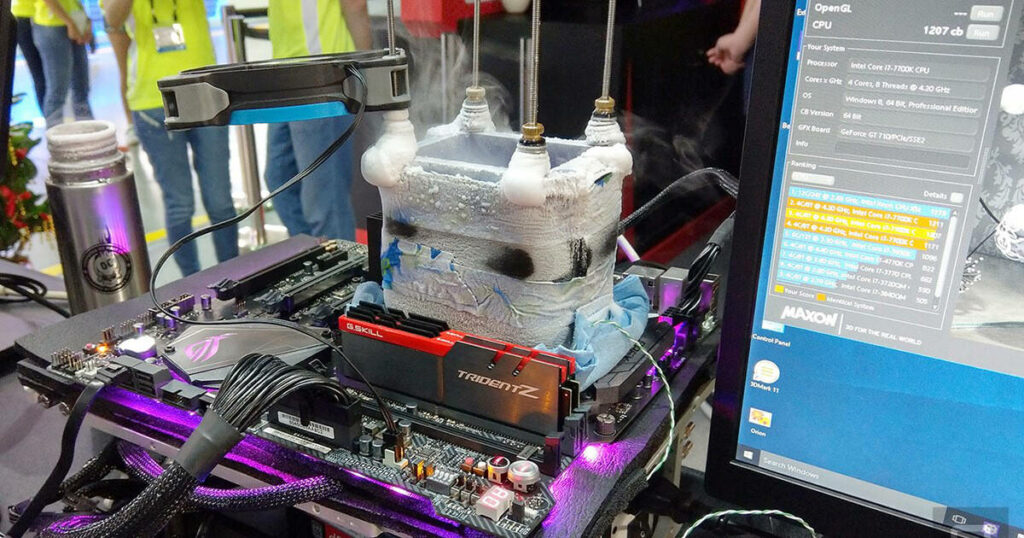
With overclocking, you can increase your PC’s performance by as much as 1GHz safely depending on the model and extend the life of your system for another couple of years. Let’s see how you do it.
The Prerequisites: Basics of Overclocking
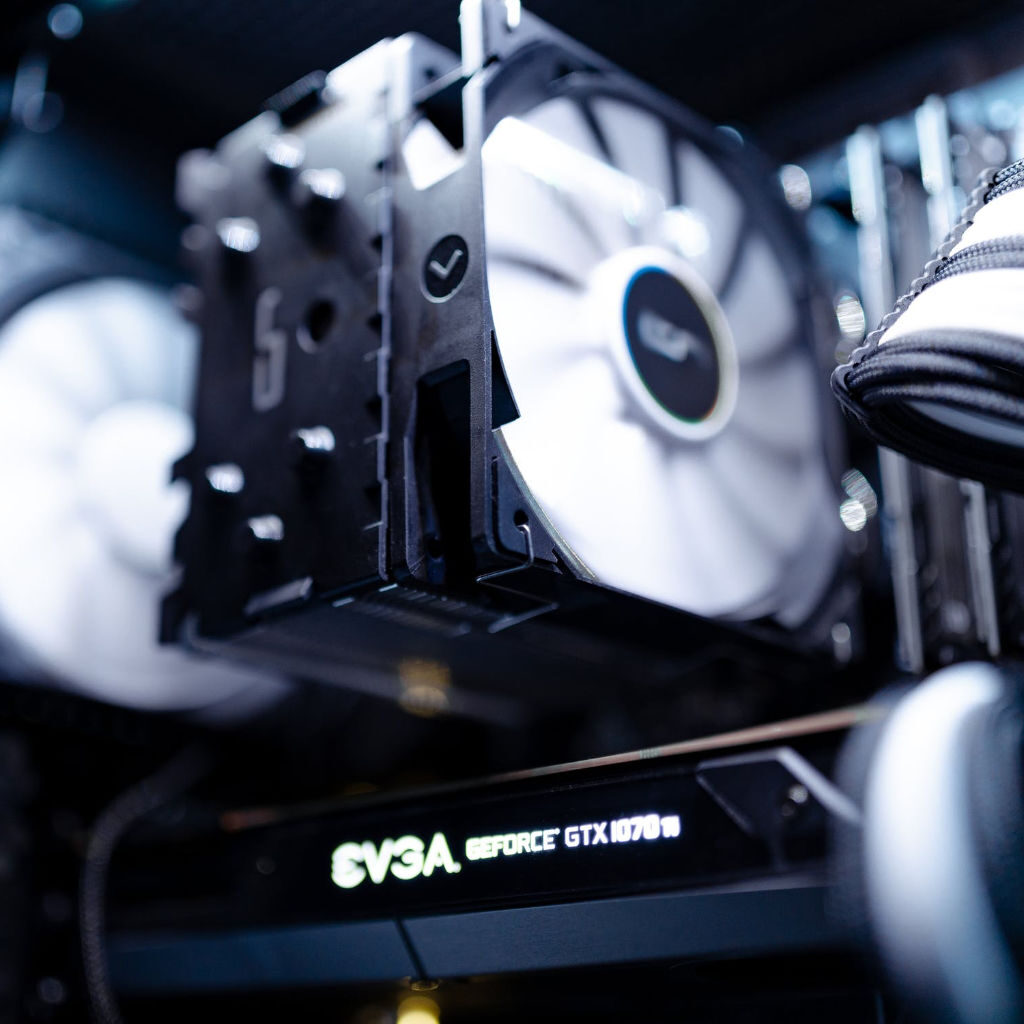
Overclocking involves a lot of research and knowledge about your hardware. You must know that only processors with unlocked multipliers can be overclocked and the motherboard too must support overclocking. Overclocking involves increasing the multiplier and voltage slowly and not every motherboard supports it. You would also need an aftermarket cooler that operates a high-speed fan for you to increase its rotations per minute (RPM) to dissipate the extra heat that would result from increasing voltage and overworking the processor. Here is what you need to keep in mind.
- If gaming is your primary area of concern, overclocking just the graphics card and that too very carefully using the MSI Afterburner application would yield better results. Only overclock your CPU if your system needs a boost outside of gaming too.
- If you are a laptop user, you should discard the thought as laptops have extremely limited cooling capabilities. You cannot do anything to improve their thermal management capabilities. Overheating or frying the CPU is common on laptops when overclocked.
- There are certain variances in manufacturing even for the same hardware and hence identical or similar components might not overclock the same way. The key here is to proceed with extreme caution. Hence, we would advise you not to jump at the results obtained in online videos and articles. Popular YouTubers have lots of laptops and components sent to them for evaluation. It is quite common to see them attempt incredible feats and achieving crazy performance results from overclocking. These short term gains may not take into consideration the long term damage to the components to take these reports and reviews with caution.
Since our readers have different hardware components which are impossible for us to know, this guide would follow a generic path suitable for most CPUs and motherboards. Specific hardware has specific voltage tolerance which you need to research and find out. Successful and stable overclocking, like retirement planning, is 1 percent action and 99 percent research.
Disclaimer: Colour My Tech is not responsible in any way if you end up with disabled systems, lost data, or fried components trying to overclock. You should do ample component-specific research and proceed with extreme caution (and at your own risks). You have been warned.
Step 1: Preparing for the Overclock
Assuming you have a powerful motherboard and a processor with an unlocked multiplier, start with downloading the Prime 95 stress tester. Even before you start overclocking you should stress test your CPU for extended periods under stable conditions and untouched multipliers and voltages to ensure it can take the extra load of overclocking.
Fire up Prime 95 and start monitoring the temperature. This application is a proven stress tester and makes all of your CPU cores run on 100 percent load. Let it run for a couple of hours. If you get abrupt reboots, black screens, blue screens, etc, you are probably out of luck. Google searching with the symptoms would tell you why you are out of luck.
If your CPU survives Prime 95’s beating. It’s time for Cinebench R15. This benchmark shows the current performance numbers of the CPU. Performance numbers are the only thing through which you can measure performance. Fire up Cinebench and let it render it’s in-built video, keep a note of the CPU temperature on the left. Note down the Cinebench score for comparisons after overclocking.
Step 2: Enter BIOS
BIOS is the most reliable way to change your processor settings for overclocking. While most processors come with an auto boost feature nowadays, it boost a single core and you don’t see considerable performance improvements. Overclocking through BIOS is what you should look at for a meaningful improvement.
Press F2, F10 or Delete repeatedly when the computer starts to enter BIOS. This defers from motherboard to motherboard so look up the manual for how to enter the BIOS. Look for Advanced Options under CPU. There should be sections called OC/Overclocking/CPU Core Settings/CPU Voltage Settings etc.
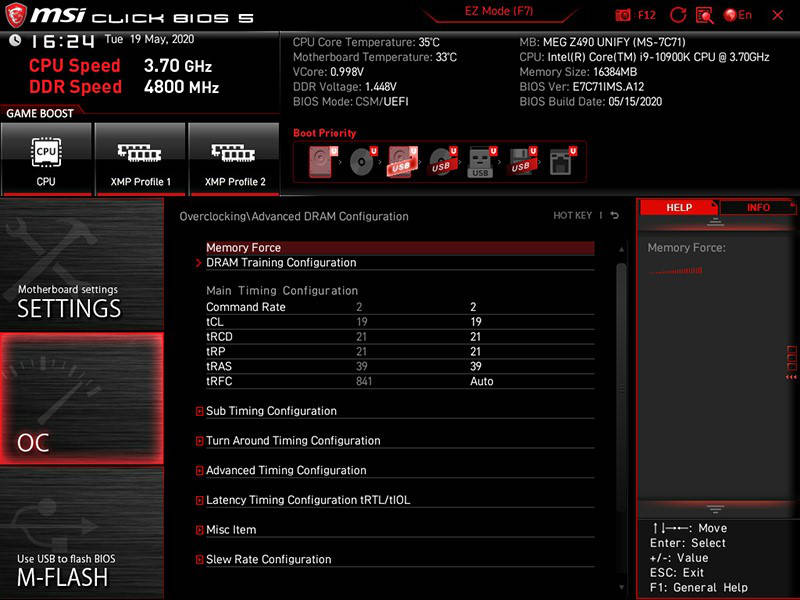
Usually, OC settings allow users to choose between automatic or manual overclocking. Automatic overclock is similar to Turbo Boost found in Intel processors where specific cores are boosted. To gain a significant advantage, you should look for the Manual Overclock option that allows you to change, the voltage and clock multiplier.
Step 3: Change the CPU Multiplier or CPU Ratio
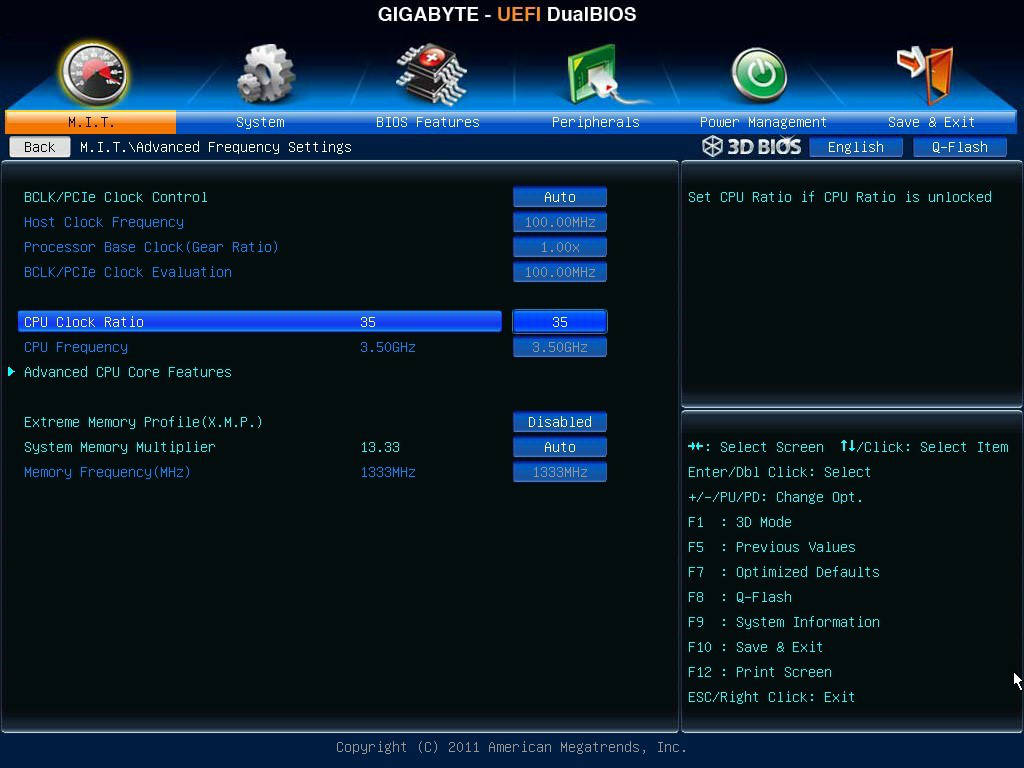
Let’s start by finding the CPU clock speed in OC settings. Usually, there is a base clock speed of 100MHz pre-set which multiplies with the value you would see under CPU Clock Ratio to result in the clock speed of the processor by default.
For example. If your processor can do 4GHz or 4000MHz by default, the CPU Clock Ratio would be set to a multiplier of 40. Increase the multiplier gradually by adding 1 to the current multiplier at a time. You may click on the multiplier figure and short press ‘+’ on the keyboard or manually write 41 (41 is an example here. You need to add 1 to your current multiplier). Restart your system and if all is well, reboot to BIOS and repeat the step a couple of times.
You need to make sure if increasing the multiplier is increasing it for all the cores or a single core. If it is just for a single core then you might add 1 to the default multiplier of all the cores and then observe before increasing the multiplier again. Remember that every increase to the multiplier would result in additional heat produced as the CPU would run faster. After increasing the multiplier twice in all the cores, save the settings and restart your system. If it boots correctly, run Prime 95 to make sure the system would be stable in the future. Also, run the Cinebench R15 to check improvement in performance scores.
Step 4: Change VCore Power Settings
Multiplier increase is pretty limited on a set power and after adding 2 or 3 to the multiplier, your CPU would need more power for further overclocking. Proceed towards CPU/Core Voltage settings.
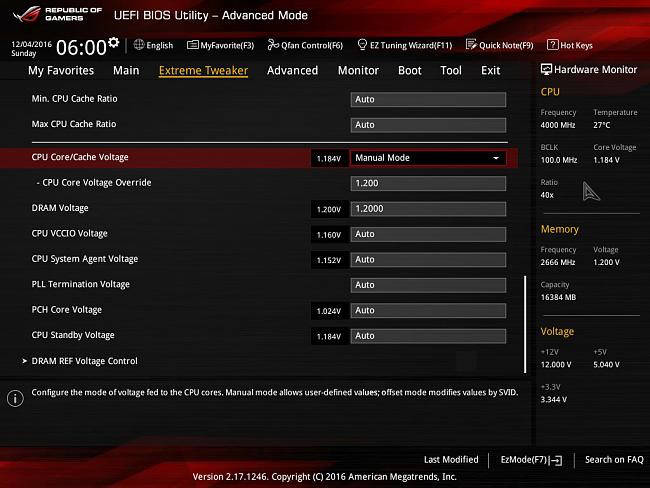
Check the default voltage settings. It should be greyed out and set at Auto. Change it to manual and add 0.05 volts to the default value and save the profile. Restart your system and observe the performance. Then add 0.10 volts and save and restart BIOS. Boot up your system and observe the performance. Now you should have more room to increase the multiplier.
Proceed with alternating the two steps gradually to your desired level. Never have unrealistic expectations that you will overclock by 2 or 3GHz. Every restart should be followed by a Prime 95 and Cinebench R15 to test the stability of the PC post overclocking. Keep track of the numbers you entered in the BIOS and write them against the Cinebench scores received for those numbers. Remember if anything goes wrong the PC would reboot and that would mean the latest change is perhaps too much for the PC to handle. It means you have reached the threshold to push your PC.
The temperature settings of the PC should not be meddled with unless you are a super pro-level user. Every time the heat increases, you reach closer to the threshold and once you reach it, the PC will reboot. Immediately revert to the last stable multiplier and voltage numbers. If you are unable to enter BIOS, clear CMOS by unplugging the battery. It would reset the BIOS to default numbers. You now know the numbers you need to safely overclock your PC.
Using Overclocking Tools
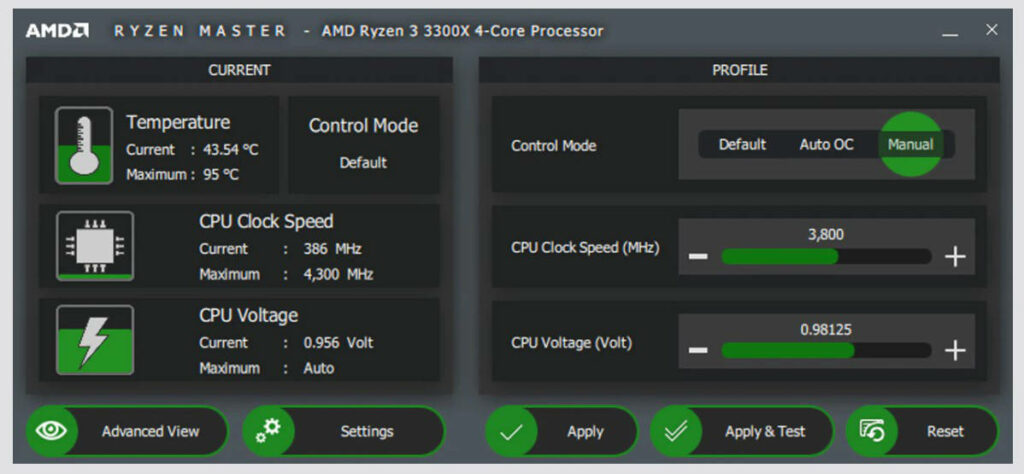
Intel and AMD both come with their Overclocking utilities that you can use to safely overclock your PC. The Intel Extreme Tuning Utility is compatible with a large number of processors from the latest and yesteryear generations. AMD Overdrive is a tool that is officially discontinued but you can still use it to overclock older generation AMD FX series processors. For the latest Ryzen processors AMD has come up with a utility called Ryzen Master.
By default, overclockers have an advantage with AMD processors as even the cheapest Ryzens come with a factory unlocked multiplier allowing users to overclock them using Ryzen Master Utility. The Ryzen Master comes with Basic and Advanced View features for entry and enthusiast-level overclockers.
Overclocking the GPU
If you need a bit more from your graphics card and cursing your PC as a whole just because it lags while gaming, you could consider overclocking your graphics card alone instead of the CPU. However, if your CPU and GPU performance are almost neck to neck and neither one is too powerful than the other, too much GPU overclocking might result in a CPU bottleneck and in that scenario you might have to slightly overclock your CPU to give it some breathing space.
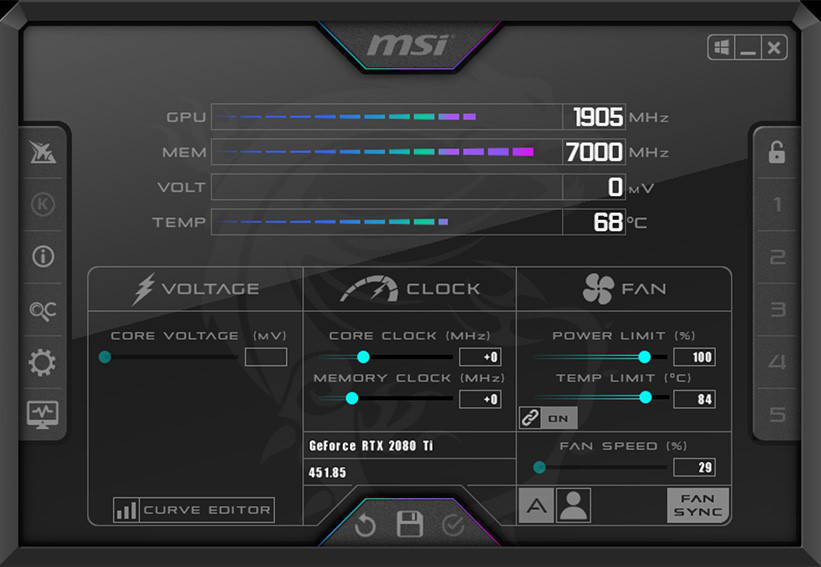
An all-in-one tool, compatible with most graphics cards irrespective of their manufacturer is MSI Afterburner that has simple controls and profile-saving features. It assumes control of your GPU’s fan and allows you to increase the GPU clock speed and voltage through baby steps and saving them.
Conclusion
Overclocking is an excellent route if you want to extract some more juice from your lagging PC. However, before you overclock, you should check for other solutions as well. You can experience a PC lag if it has not been optimized and cleaned for several months. Use our How to Optimise Your PC series and discover ways to speed up your PC with and without hardware upgrades.
- How to Optimise Your PC I: How to allocate SSD storage as RAM to boost the speed of your computer
- How to Optimise Your PC II: How to stop services to free up resources on your computer
- How to Optimise Your PC III: Affordable hardware upgrades to speed up your PC
- How to Optimise Your PC IV: Best paid and free applications to clean your PC
- How to Optimise Your PC V: Guide to Safely Overclock Your PC [YOU ARE HERE]
With overclocking you can refer to videos and articles that deal with your hardware online but your takeaway from them should be strictly limited to the process and not the results. To put things into perspective, using liquid nitrogen as a coolant, some users were able to overclock their CPU to 5GHz in 2003 which was considered an insane speed at that time. You can’t get similar improvements under home conditions.


