How to Use Raspberry Pi to Build a Retro Gaming Console – The Ultimate Resource Page
Turning a Raspberry Pi into a retro gaming console is one of the most popular projects among enthusiasts. Thanks to software like RetroPie, it’s relatively straightforward. Here’s how you can build your own retro gaming console with a Raspberry Pi. We look at what you need to start, take you through the 5 easy steps and put together all the resources in one place, turning this into the ultimate resource page.
If you are an absolute beginner, you can read about the Raspberry Pi Project in our earlier post, why use it and the different projects to choose from as beginners to advanced users including the type of work and skills required to complete those projects.
Prerequisites:
Here is what you will need, hardware wise to get started.
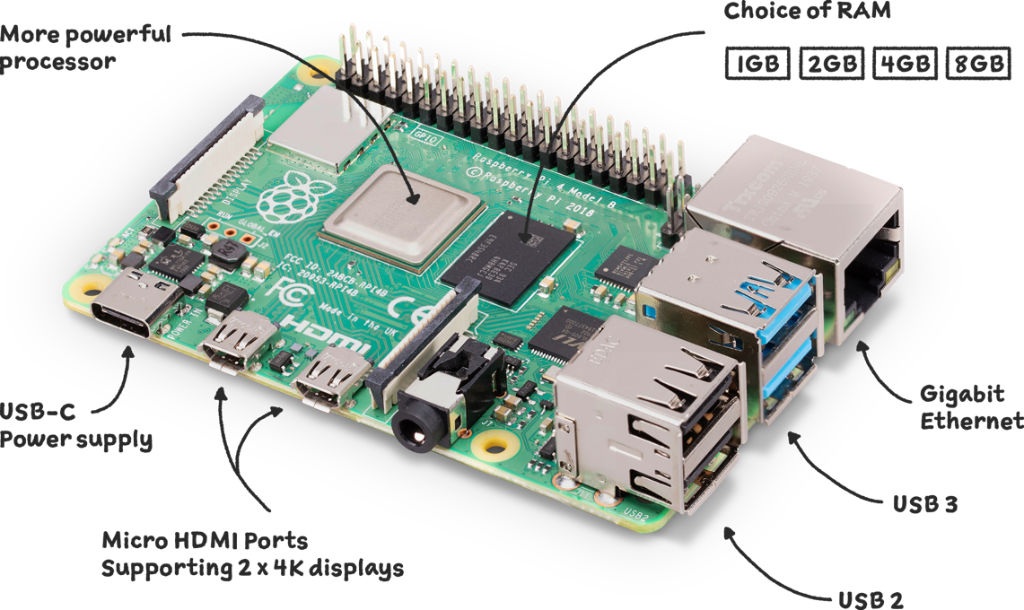
- Raspberry Pi (Model 3 or newer recommended, the latest model being Raspberry Pi 5 with up to 8GB RAM memory). However, at the time of writing, RetroPie the game emulator has ROM images for Raspberry Pi 1/Zero, 2, 3/Zero 2 W and 4/400 only.
- MicroSD card (16GB or more recommended).
- Raspberry Pi power supply.
- HDMI cable and a monitor/TV.
- USB controller (classic gamepad styles are available).
- Keyboard and mouse for initial setup.
- Internet connection (for downloading ROMs and updates).
Using Raspberry Pi to Build a Retro Gaming Console in 5 Easy Steps
Raspberry Pi is a versatile microcomputer that is perfect for emulating classic gaming systems. This step-by-step guide will walk you through the process of turning your Raspberry Pi into a retro gaming console, bringing back those nostalgic games right into the modern era. Let’s get started!
Step-by-Step Guide
Once you have all you will need from the hardware list above, follow the steps below:
1. Download and Install RetroPie
Raspberry Pi-based retro gaming setups combines a suite of software and emulators that allow you to play a wide range of classic games from different eras, all from a single interface. To begin, navigate to the RetroPie official website where you’ll find different versions of the software optimized for various Raspberry Pi models. Ensure you select and download the version tailored for your specific model to guarantee optimal performance.
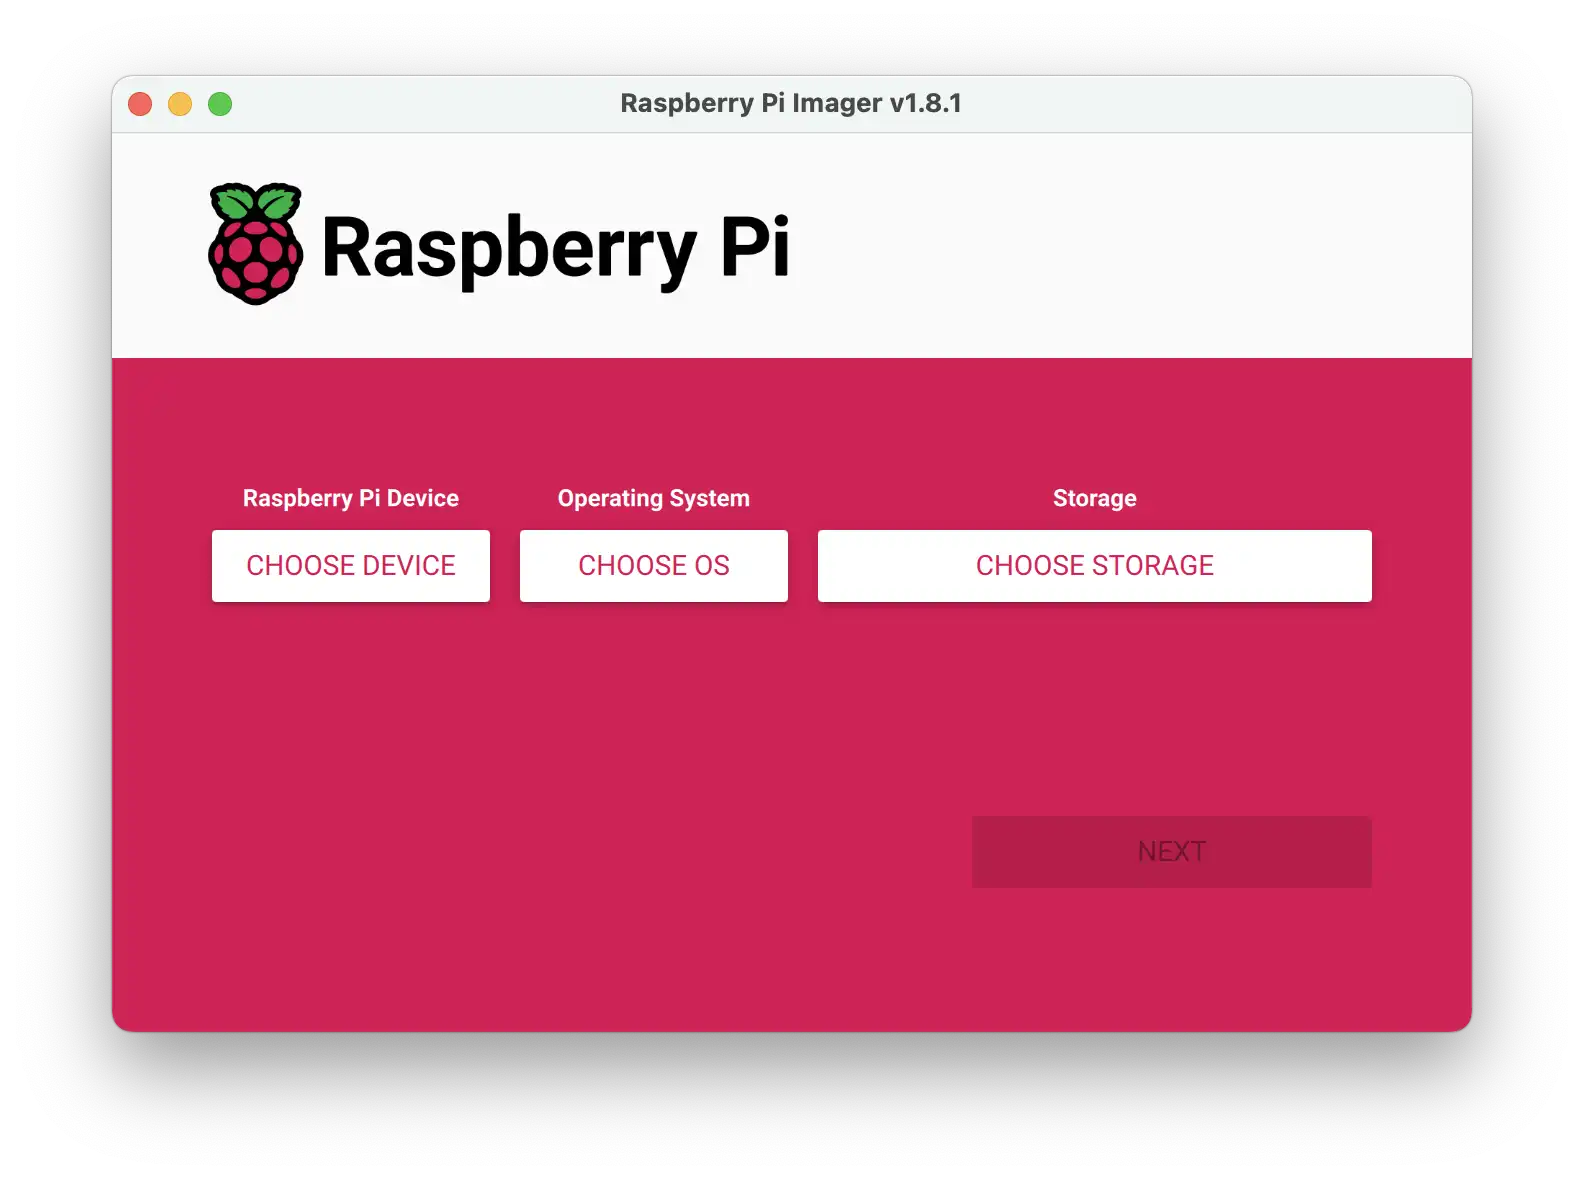
After downloading the RetroPie image, the next step is to transfer it onto your MicroSD card. Software applications like BalenaEtcher or Raspberry Pi Imager (from Raspberry Pi themselves) provide a streamlined process for this task. Both tools come with intuitive interfaces that guide you through the image-writing process. Ensure your MicroSD card is properly formatted, select the downloaded RetroPie image, and initiate the writing process. It might take a few minutes, but once completed, safely eject the MicroSD card from your computer.
Finally, insert the card into the Raspberry Pi’s slot, connect your Pi to a power source, and watch as it boots up into the RetroPie interface, marking the first step towards your retro gaming journey.
To summarise, here are the steps:
- Go to the RetroPie official website and download the appropriate version for your Raspberry Pi model.
- Write the downloaded image to your MicroSD card using software like BalenaEtcher or Raspberry Pi Imager.
- Once written, insert the MicroSD card into the Raspberry Pi and power it up.
2. Initial Setup
The first time you boot up with RetroPie on your Raspberry Pi, the system prioritizes getting your gaming controls in order. An intuitive setup wizard will pop up, prompting you to configure your gamepad. Whether you’re using a classic USB controller, a modern Bluetooth gamepad, or any other compatible control interface, the process is straightforward. As you press the buttons on your controller, simply match them to the corresponding on-screen prompts. Ensuring accurate configuration here is crucial for an enjoyable gaming experience later on.
Once the gamepad setup is complete, connecting your Raspberry Pi to the Internet is the next order of business. An active connection not only facilitates system updates but also opens the door to a plethora of additional game emulators and packages. Depending on your setup, you can either plug in an Ethernet cable for a wired connection or access the RetroPie settings to configure a Wi-Fi connection. This ensures your system is always up-to-date and provides a gateway to an expansive world of classic games.
- Upon first boot, RetroPie will guide you through setting up your gamepad. Follow the on-screen instructions to configure the buttons.
- Connect your Raspberry Pi to the Internet using Wi-Fi or an Ethernet cable. This will allow you to update the system and download additional packages if needed.
3. Loading Games (ROMs):
ROM files are essentially digital copies of games. These are what you’ll run on your emulator to recreate the classic gaming moments. However, it’s crucial to emphasize the legal aspect: you should only possess ROMs of games that you legally own. Downloading or distributing copyrighted games without proper authorisation can lead to legal repercussions. Always ensure you’re abiding by laws and regulations pertaining to game ownership and distribution. Check out the Resources section for where to find ROMs.
Transferring your ROMs to the Raspberry Pi is a process that can be accomplished in a couple of different ways, depending on your preference:
- Using a USB Stick: This method is particularly user-friendly, especially for those who might not be too tech-savvy. Start by inserting your USB stick into a computer and creating a new folder named
retropie. Once done, plug this USB stick into the Raspberry Pi. The system will recognize the folder and automatically set up the necessary directory structure. When you later plug this USB into a computer, you’ll find it populated with folders representing various gaming consoles. All you have to do is drag and drop your ROMs into the appropriate folders. Reconnect the USB to the Raspberry Pi, and the system will handle transferring the ROMs, making them ready for play. - Using SFTP (Secure File Transfer Protocol): For those comfortable with a slightly more technical approach, SFTP provides a direct way to transfer files over a network. Tools like FileZilla offer an easy interface to accomplish this. First, ensure your Raspberry Pi and your computer are on the same network. Open your SFTP client and connect to your Raspberry Pi using its IP address (typically something like
192.168.x.x). Once connected, navigate to the/home/pi/RetroPie/roms/directory. Here, similar to the USB method, you’ll find folders representing different consoles. Simply transfer your ROMs into the relevant folders. This method bypasses the need for physical media, offering a seamless transfer process.
To summarise, here are the steps:
- ROMs are the game files you’ll play. Note that you should only download and use ROMs for games you own to stay within legal boundaries. To transfer ROMs to your Raspberry Pi:
- Use a USB stick: Create a folder named
`retropie`on a USB stick, plug it into the Raspberry Pi, and wait for it to stop blinking. Then, on your computer, you’ll see folders for each console. Drop the ROMs into the respective folders and plug the USB back into the Pi. The ROMs will be transferred automatically. - Use SFTP: Connect to your Raspberry Pi using software like FileZilla with the IP address of the Pi. Navigate to
`/home/pi/RetroPie/roms/`, and you’ll see folders for each console. Transfer ROMs to the appropriate folders.
4. Install Additional Emulators
RetroPie, out-of-the-box, is already a powerhouse for retro gaming, offering a suite of popular emulators that cater to a vast majority of classic consoles. However, the beauty of RetroPie lies in its expandability, allowing users to go beyond the pre-installed offerings. Whether you’re looking to dive into a less common gaming system or want the latest updates for a specific emulator, the RetroPie setup script makes this process intuitive.
Located within the RetroPie menu, this setup script acts as a gateway to the repository of available emulators. By navigating through its options, users can select, download, and install additional emulators with ease. It’s a feature that ensures your retro gaming setup remains dynamic, adapting to your evolving preferences and the ever-growing world of emulation.
Remember, after installing a new emulator, ensure you have the corresponding ROMs and that they’re placed in the correct directories for a seamless gaming experience.
5. Optional Enhancements
What truly elevates RetroPie is the ability to customise and enrich the user experience. To start, themes offer a chance to inject a touch of personal flair into your setup. The default RetroPie interface is functional and clean, but maybe you’re after a nostalgia-infused aesthetic or a sleek modern design. By navigating to the RetroPie setup, a plethora of downloadable themes awaits, allowing you to transform the look of your gaming dashboard to your heart’s content.
Next up is scraping, a feature that breathes life into your game library. While having a list of ROMs is functional, adding game artwork and rich metadata transforms your collection into a visual treat, creating a more immersive browsing experience. Selph’s Scraper, integrated within RetroPie, automates this process, sourcing high-quality images and game descriptions.
Lastly, the convenience of save states can’t be overstated. Gone are the days of lengthy password sequences or losing progress because you had to shut off your console. Most emulators in RetroPie offer the ability to snapshot your game at any moment, allowing you to return and continue from that exact instance, ensuring that your gaming adventures are always uninterrupted.
To summarise, here are the enhancements with RetroPie:
- Themes: Personalize your RetroPie’s look by downloading and applying themes from the RetroPie setup.
- Scraping: To get game artwork and metadata, use a tool like Selph’s Scraper available within RetroPie.
- Save States: Most emulators within RetroPie allow you to save your game state, letting you pick up exactly where you left off.
Shutdown Properly
Finally, this is now one of the steps to get your up with a retro gamin machine, but when you are done enjoying and reliving your past, avoid simply unplugging your Raspberry Pi. This can corrupt the MicroSD card. Instead, use the shutdown option within RetroPie’s menu to shutdown your retro console safely.
Search Raspberry Pi Case on Amazon
Resources
Ready to take your project further, use the following resources to continue your retro gaming journey, building on your existing hardware and levelling up your project.
- Retro Gaming with Raspberry Pi – 164 Pages of Projects from the MagPi Magazine. Download the free PDF or by the print copy
Where to Download Retropie ROMS
- MAMEDEV is a website to find an archive of free and legal games released as freeware
- Coleco Vision Addict is a website with a vast directory of games organised by Legacy, Homebrew, Prototype and Educational. Most of these come with the original vintage box art. You can also see screenshots and in-game videos on some before deciding if you wish to download them.
- Cool ROM features ROMs for Ataris, Commodore 64, CPS1 and 2, MAME, Namco System 22, Neo Geo consoles, Sega consoles and Sony Playstation and Playstation 2
- Free ROMs offers compilation of games downloadable for various consoles. It makes life easier for retro games by offering Windows and sometimes Mac emulators up front for. You can then select from an A-Z directory or by Most Votes, Highest Rated and Most Popular.
- Restrostic caters to retro gamers by offering ROM and ISO images as well as emulators. The site claims to have around 70k titles for over 40 consoles.
- Rom Hustler is a website offering some of the more console ROMs. They include the PlayStation 3, Nintendo 3DS and Nintendo Wii. Like all websites here, the ROMs directories are by consoles. You can also find a list of emulators to run those ROMs
- Zophar has a list of public domain ROMS for most of the platforms. The Console list is rather limited but you are assured that these are in fact in the public domain so no issues with copyright claims.
Preloaded MicroSD cards
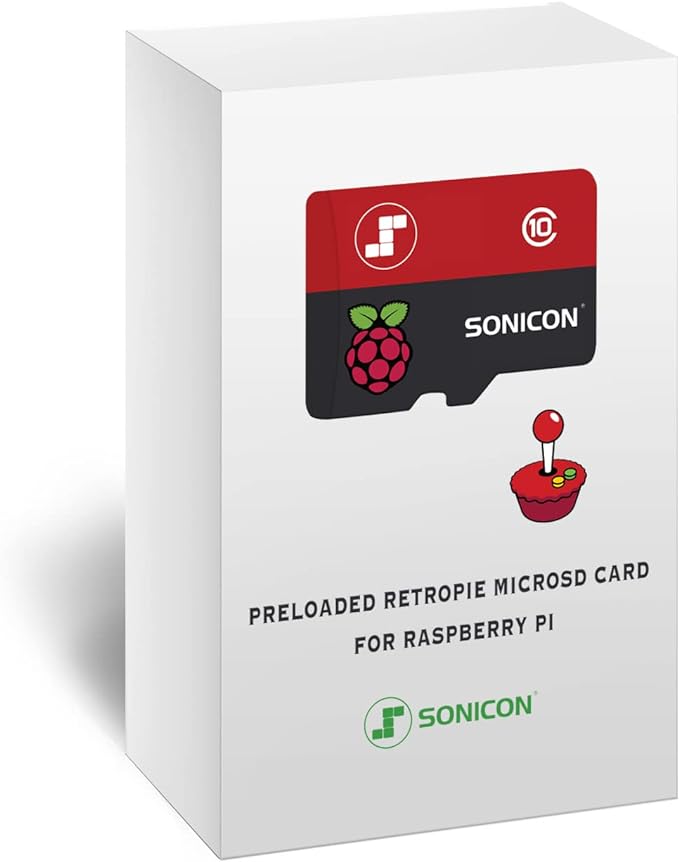
If you don’t like the hassle of downloading individual ROM and loading up different emulators, you can get a MicroSD card preloaded with RetroPie Emulator and Games. Depending on the vendor, these can support some 10+ system and preloaded with over 10k games titles. Bigger bundle options can include over 50 systems and 22k games titles.
Other Tutorial Pages and Communities
Building a retro gaming console with a Raspberry Pi is a delightful journey back in time, allowing you to relive classic games. It’s not only a nostalgic experience but also an educational one, as you familiarize yourself with the mechanics of setting up emulators and managing game files. Enjoy your trip down memory lane!


